 AutoCaptions
 AutoCut Silences
 AutoCut Podcast
 AutoCut Angles
 AutoZoom
 AutoViral
 AutoB-Rolls
 AutoCut Repeat
 AutoProfanity Filter
 AutoChapters
 AutoResize
 Help Center
 Blog
Blog Discord
 YouTube
 Ambassador
Myriam HINDERER
Chief Marketing & Communication Officer
2026-08-28
How to Add Automatic Dynamic Zooms to Your Videos with AutoCut AutoZoom (2026 Update)
Learn how to add dynamic, perfectly synced zooms to your entire video automatically with AutoCut AutoZoom. This update covers the new Highlight Meaning AI, custom zoom sounds, and simulated camera movement.
Summarize content with
 Chatgpt
 Mistral
 Gemini
 Perplexity
What is AutoCut AutoZoom?
AutoZoom is built for YouTubers, entertainment creators, and anyone who wants to automate one of the longest manual tasks in editing: placing zooms across an entire video.
Instead of scrubbing through your timeline and keyframing each zoom by hand, AutoZoom analyzes your footage and places every zoom for you, in one click.
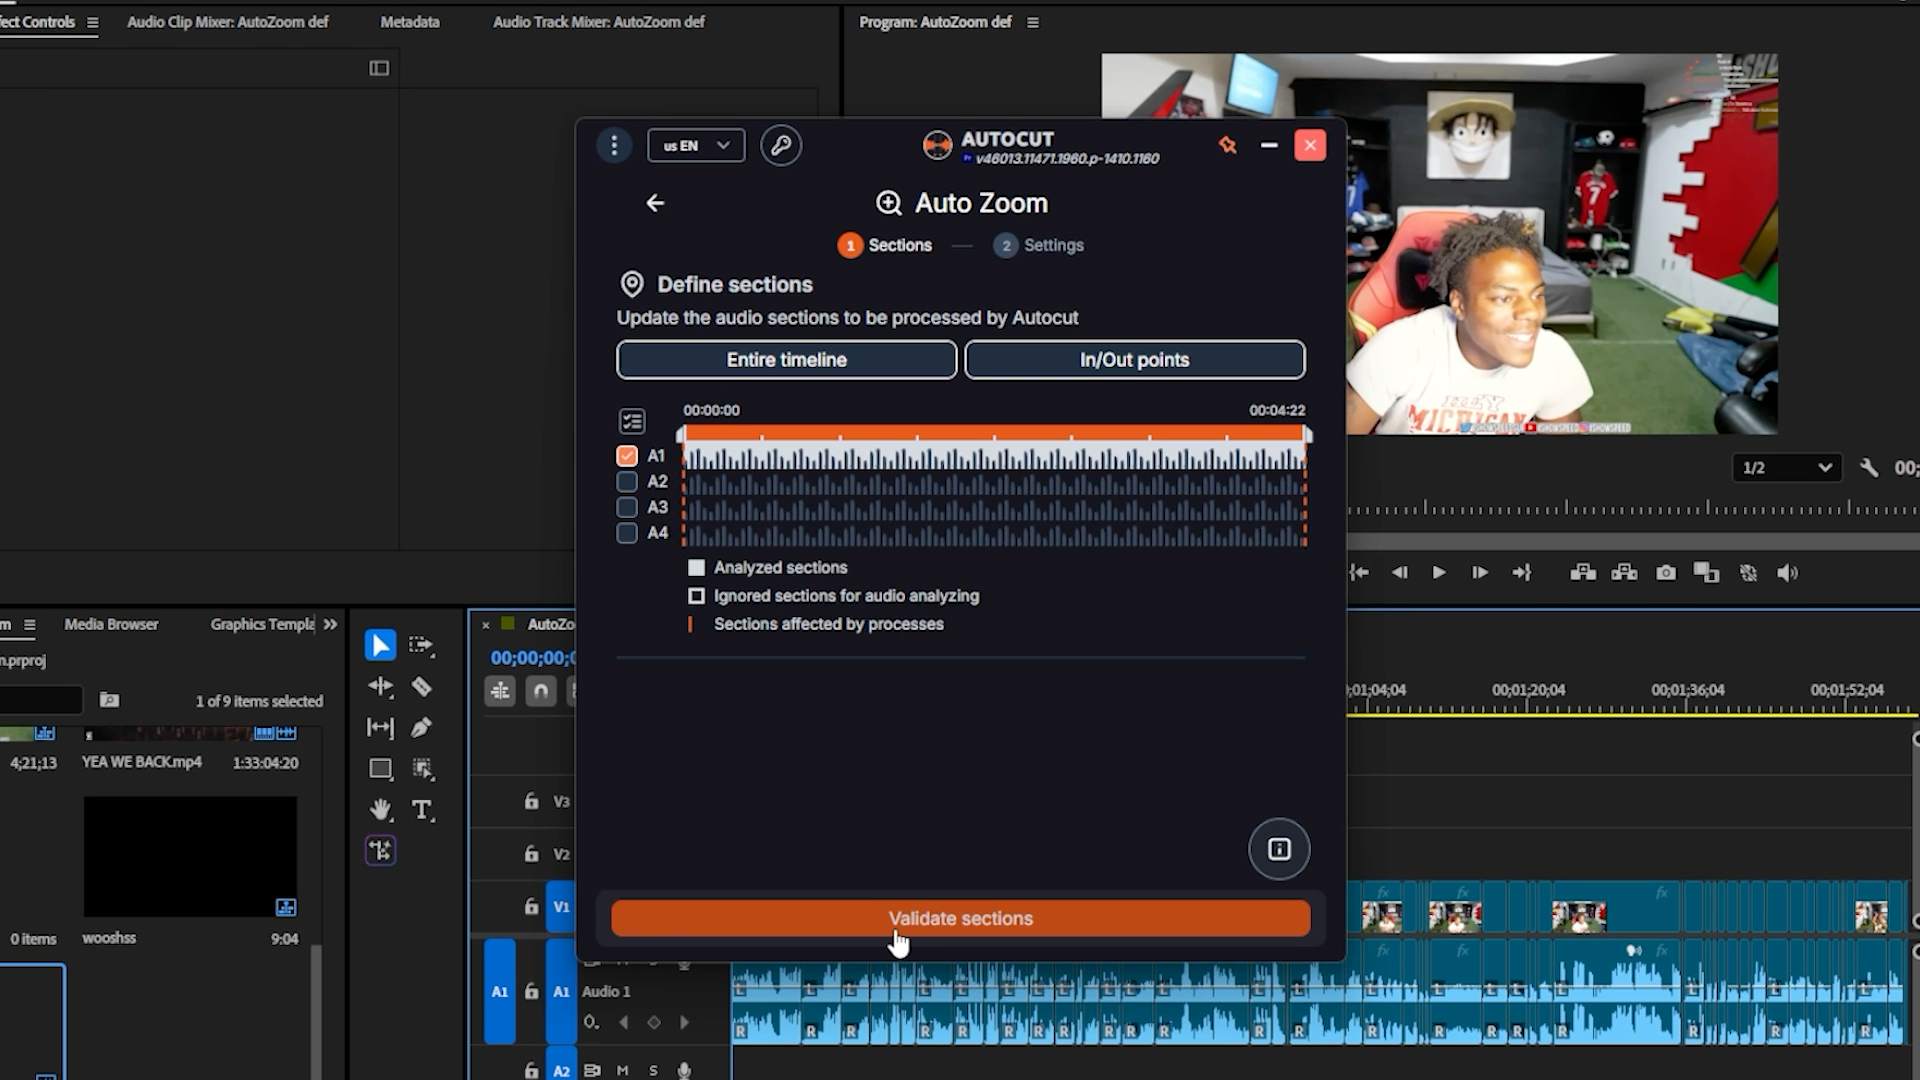
Step 1: Select your section and validate
Open AutoZoom, select your section on the timeline and the audio tracks linked to your footage, then click Validate sections.
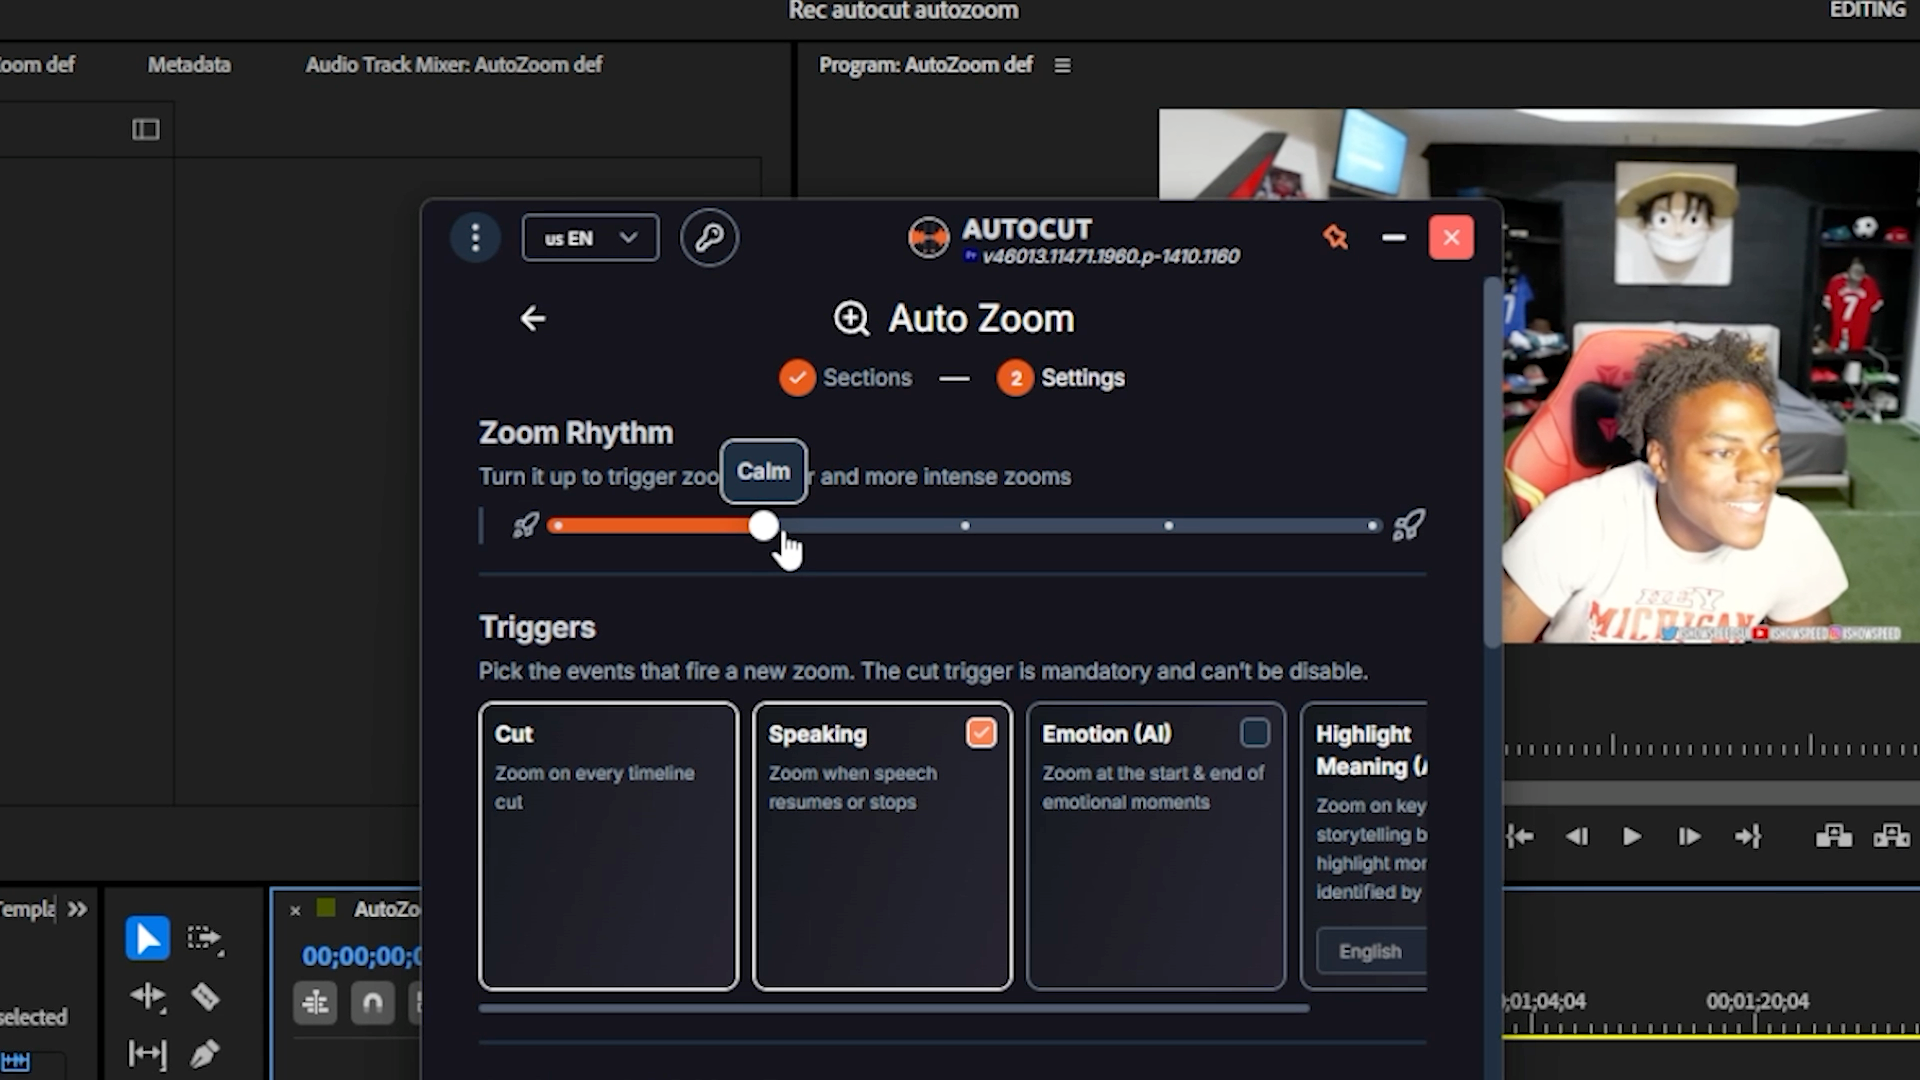
Step 2: Set your zoom rhythm
The zoom rhythm slider controls how fast and dynamic your zooms get. The higher you push it, the more dynamic the result. A medium rhythm usually gives enough dynamism without becoming tiring to watch.
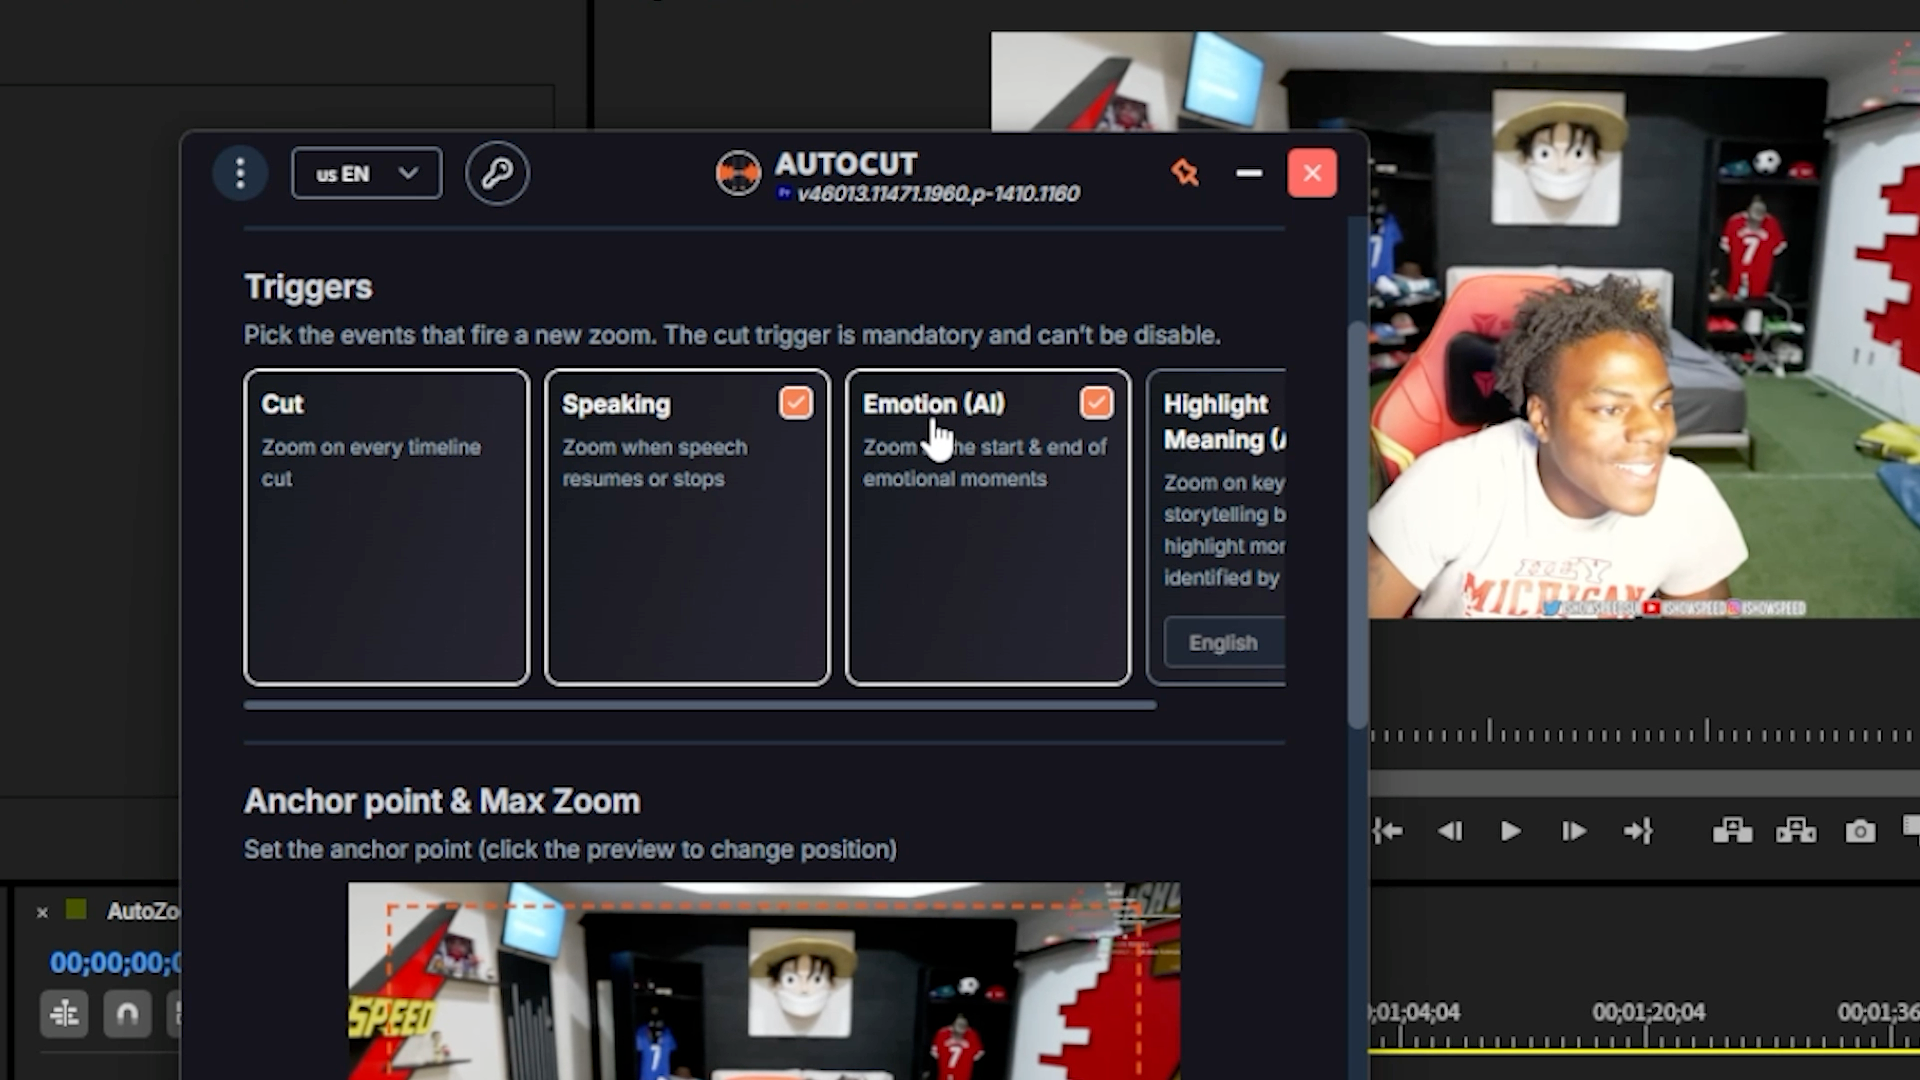
Step 3: Choose your zoom triggers
Triggers are the events that tell AutoZoom when to place a zoom:
- Cut: mandatory, always on.
- Speaking: zooms whenever speech resumes or stops.
- Emotion AI: zooms on your most intense moments.
- Highlight Meaning AI (new): automatically zooms on the key points and standout moments in your speech, detected by AI. You need to specify the language of your footage for the analysis to work.
Step 4: Set your anchor point and max zoom level
Use the preview to set your anchor point, the point every zoom heads toward. This is especially useful if your subject isn't centered in frame. Then set your max zoom level, the maximum zoom AutoCut is allowed to apply.
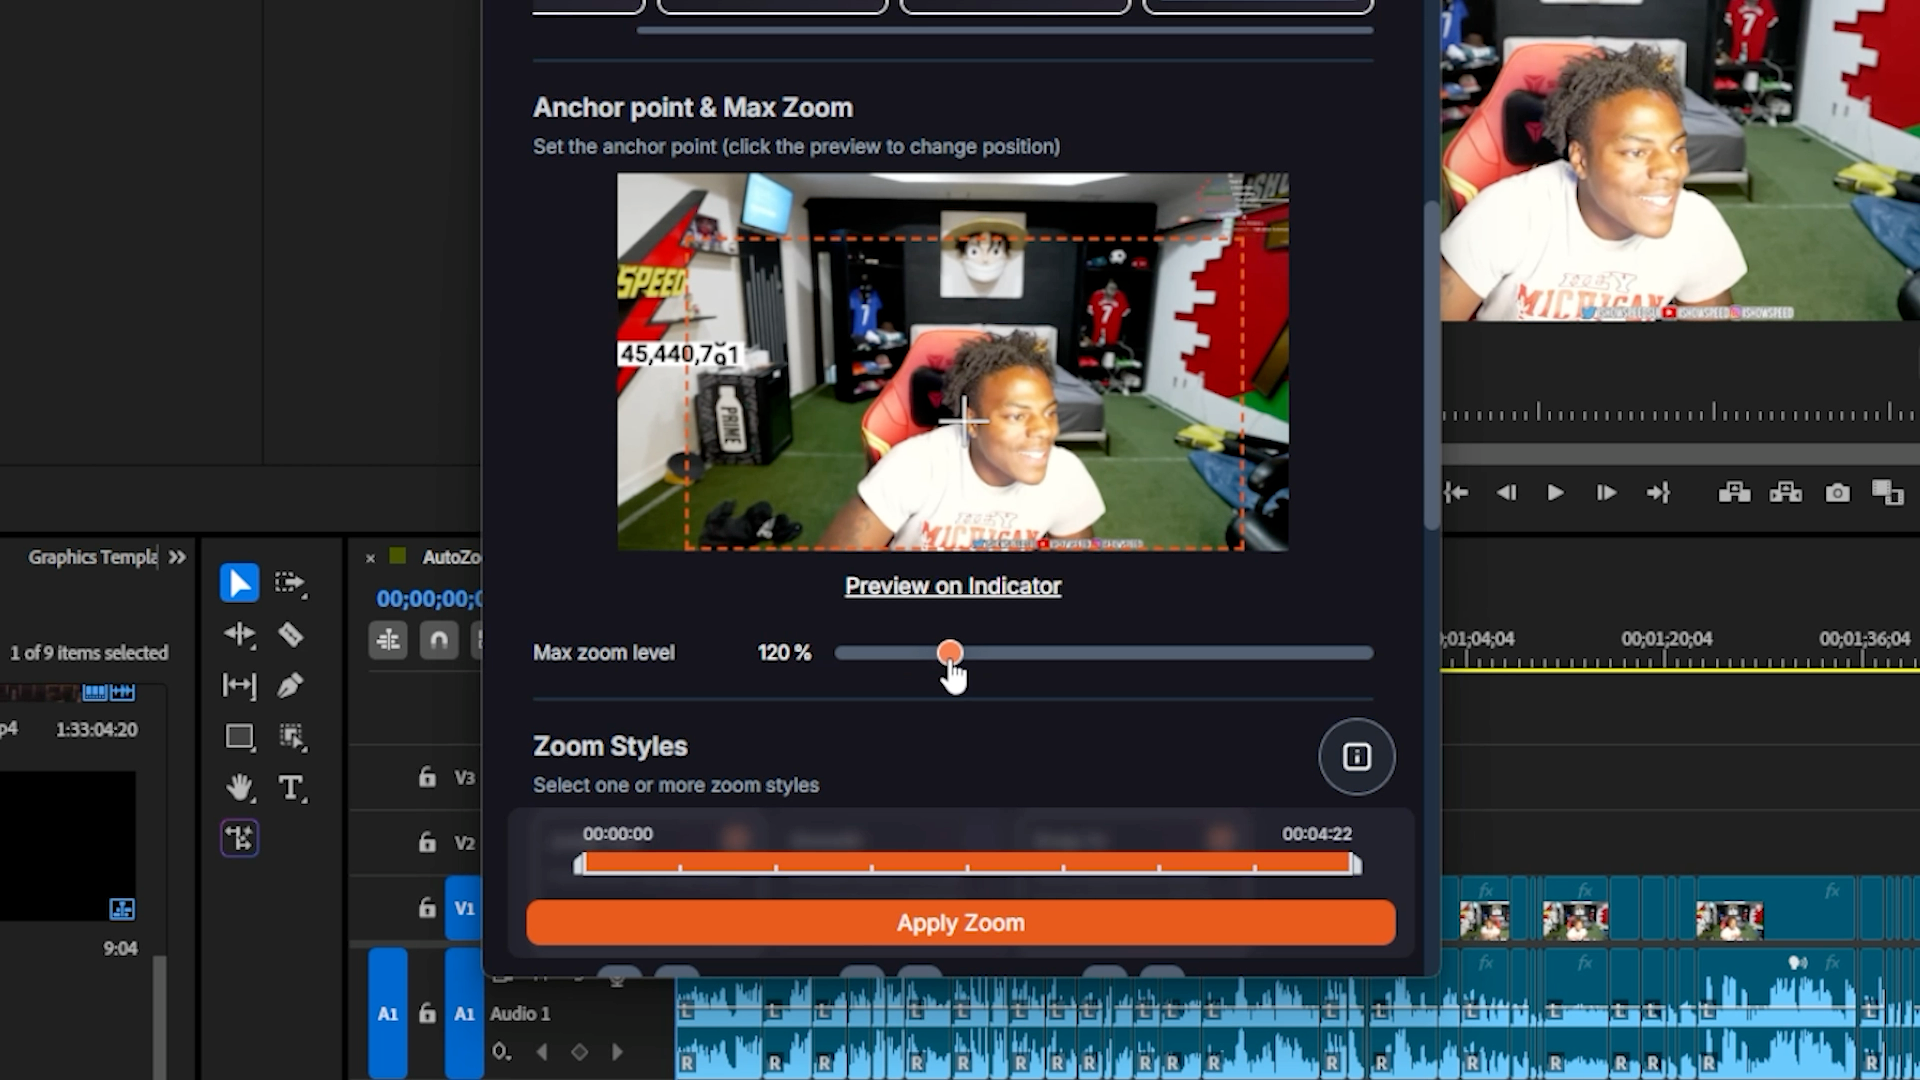
Step 5: Pick your zoom styles, and new custom sounds
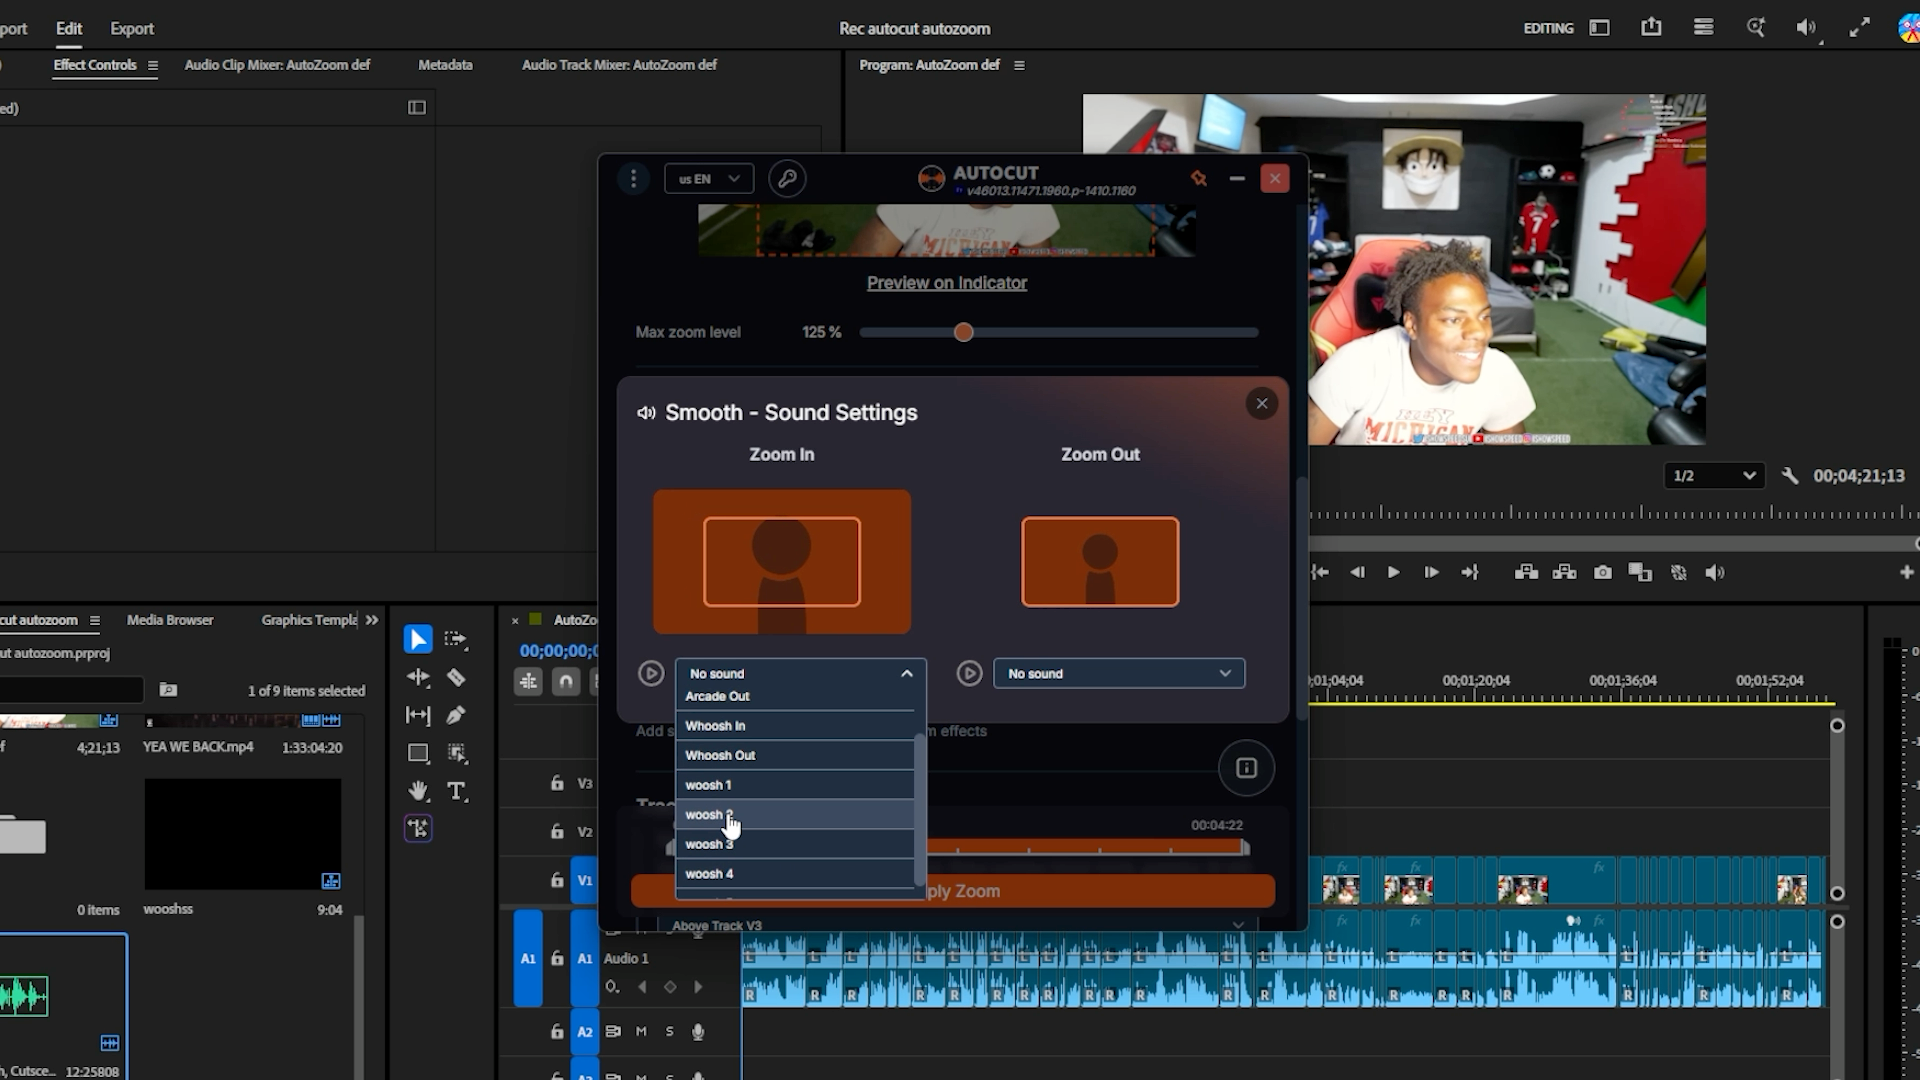
Choose your zoom style: Jump cut for a hard zoom with no keyframe, Smooth for a fluid progressive zoom, or Snap in for a fast progressive zoom. You can also check all three styles at once, and AutoCut will automatically switch between them.
New in this update: you can add a different sound to the zoom in and the zoom out for each style, or import your own sounds. Click Manage, then Add a new sound, and import whatever sound you want. From there, head back to a zoom style and pick the sound you want to attach to it.
Step 6: Camera movement and track selection
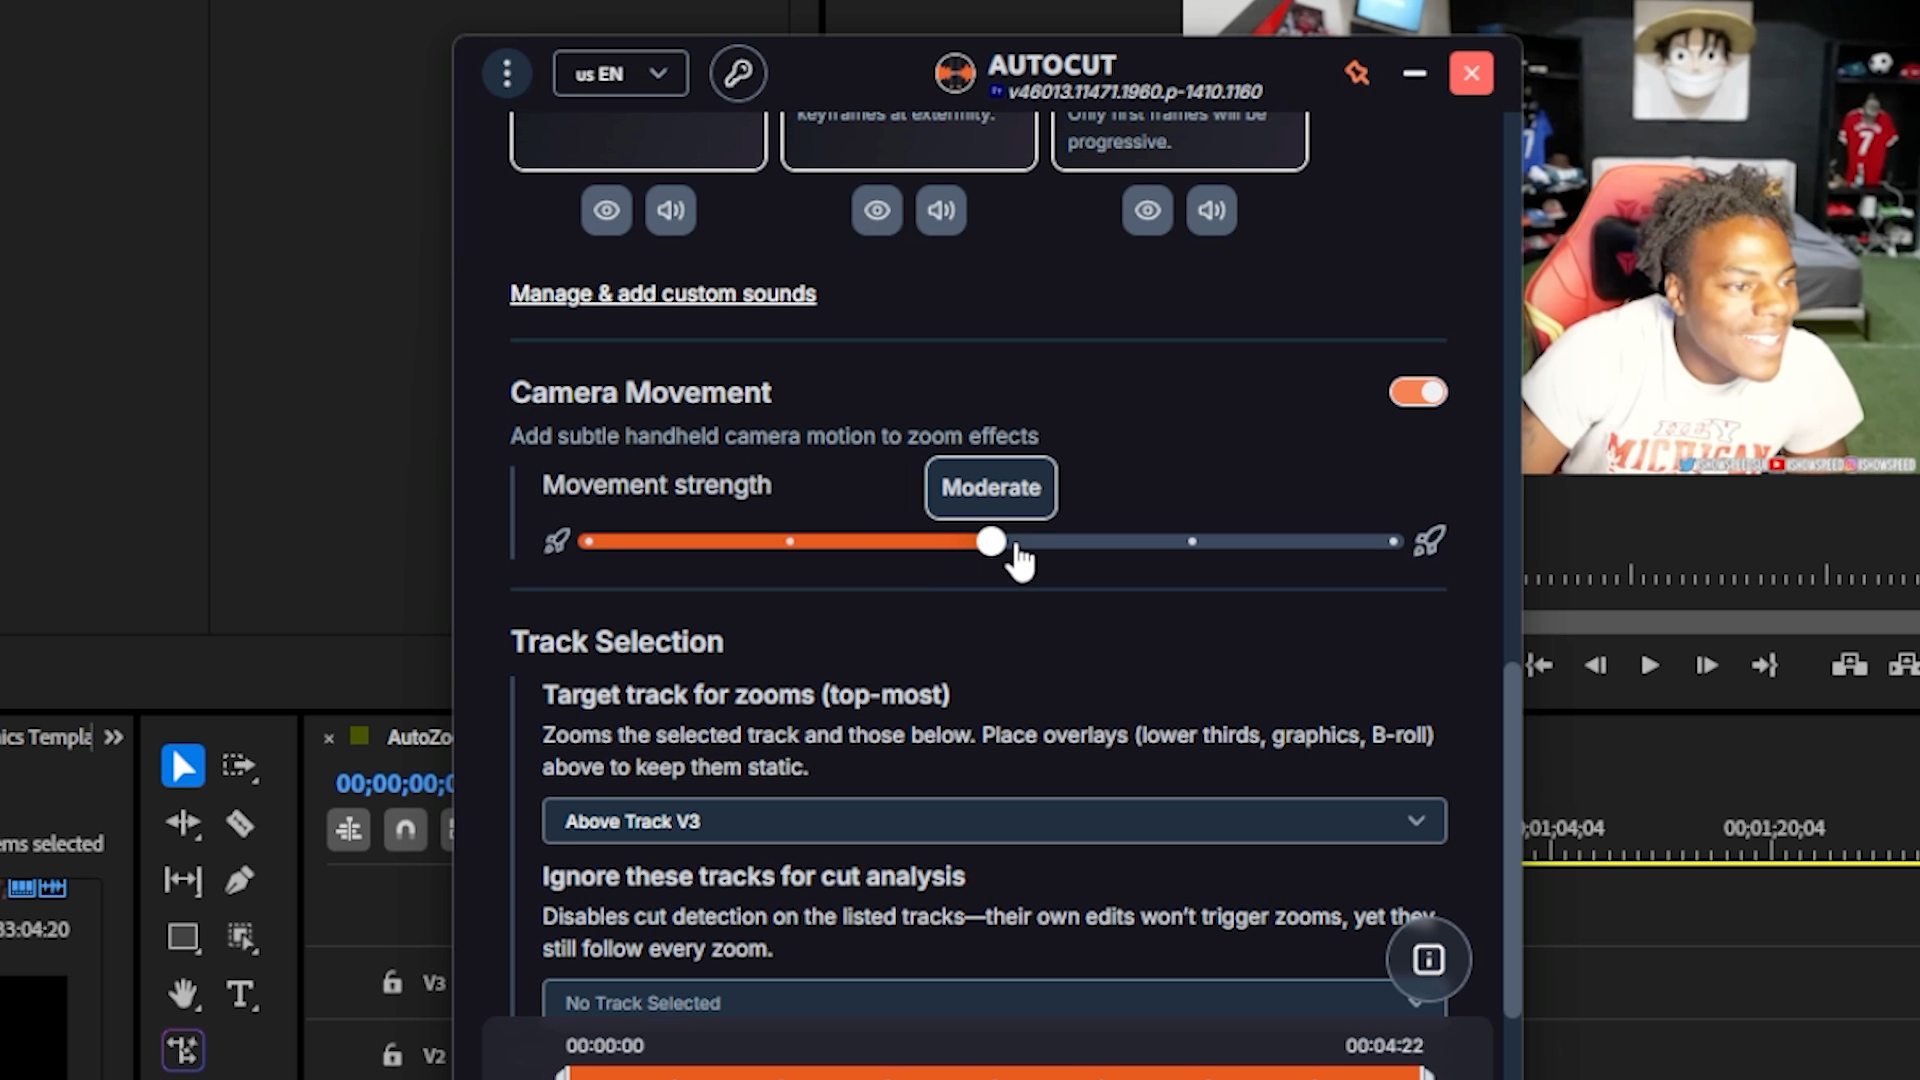
Turn on Camera movement if you want to add a subtle handheld feel to your zooms for an even more natural result. Then pick your track selection: the target track for your zooms, everything below it gets zoomed, while overlays above stay static. You can also ignore certain tracks so they don't trigger a zoom during cut analysis.
Step 7: Apply, without ever touching your original footage
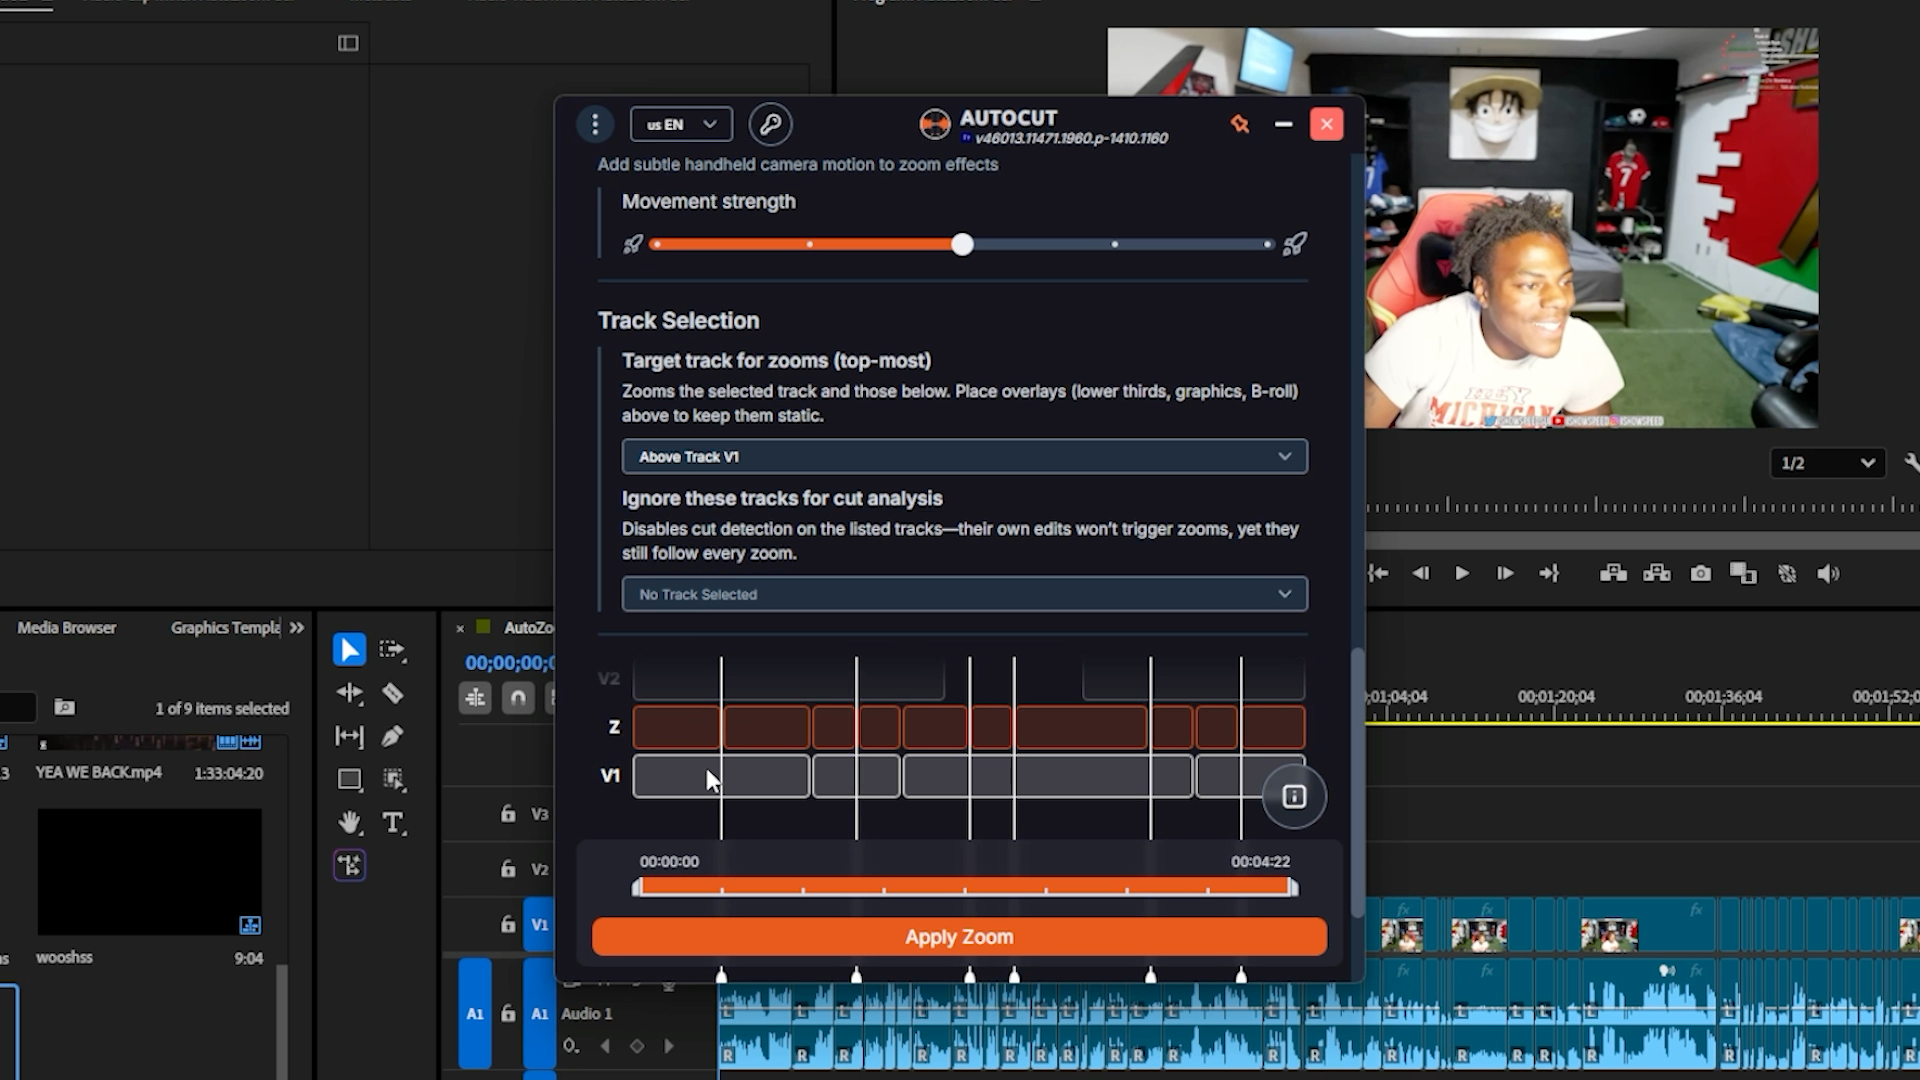
Once everything looks good, click Apply zoom. All your zooms are added automatically to your timeline, without placing a single one by hand.
Every zoom lands on a separate effects layer, so if you want to tweak or delete one, you can do it in a single click, without touching your original footage.
What's new in this AutoZoom update
This update brings three real additions to AutoZoom: Highlight Meaning AI to zoom on the key points of your speech automatically, custom sound effects on every zoom in and zoom out, and camera movement simulation for a more natural, handheld feel. Together, they make AutoZoom faster to set up and more precise than ever.
Try AutoCut free for 14 days, no credit card needed.
Myriam HINDERER
Chief Marketing & Communication Officer