
 AutoCaptions
 AutoCut Silences
 AutoCut Podcast
 AutoCut Angles
 AutoZoom
 AutoViral
 AutoB-Rolls
 AutoCut Repeat
 AutoProfanity Filter
 AutoChapters
 AutoResize
 Help Center
 Blog
Blog Discord
 YouTube
 Ambassador
Myriam HINDERER
Chief Marketing & Communication Officer
2026-07-09
New update - How to remove every silence in 1 minute with AutoCut
Learn how to automatically remove silences from your videos in just 1 minute with AutoCut Silence. Step-by-step tutorial covering all settings, the AI-powered noise threshold, pacing presets, and the new update that makes AutoCut up to 59× faster.
Summarize content with
 Chatgpt
 Mistral
 Gemini
 Perplexity
What Is AutoCut Silence?
AutoCut Silence is a powerful plugin that automatically detects and removes silent moments from your video timeline: no manual scrubbing required. It integrates directly into your editing software, including Premiere Pro and DaVinci Resolve, and handles everything from silence detection to smooth audio transitions without you lifting a finger.
The plugin works by analyzing your audio track in real time, identifying gaps and pauses that slow down your content, and cutting them out automatically. What used to take hours of tedious frame-by-frame editing now takes literally one minute: freeing you up to focus on the creative work that actually matters.
Whether you're producing YouTube tutorials, interviews, online courses, or any talking-head content, AutoCut Silence gives you a clean, tight edit in a fraction of the time. It's one of the most impactful tools you can add to your post-production workflow.
Step 1: Open AutoCut Silence & Select Your Sections
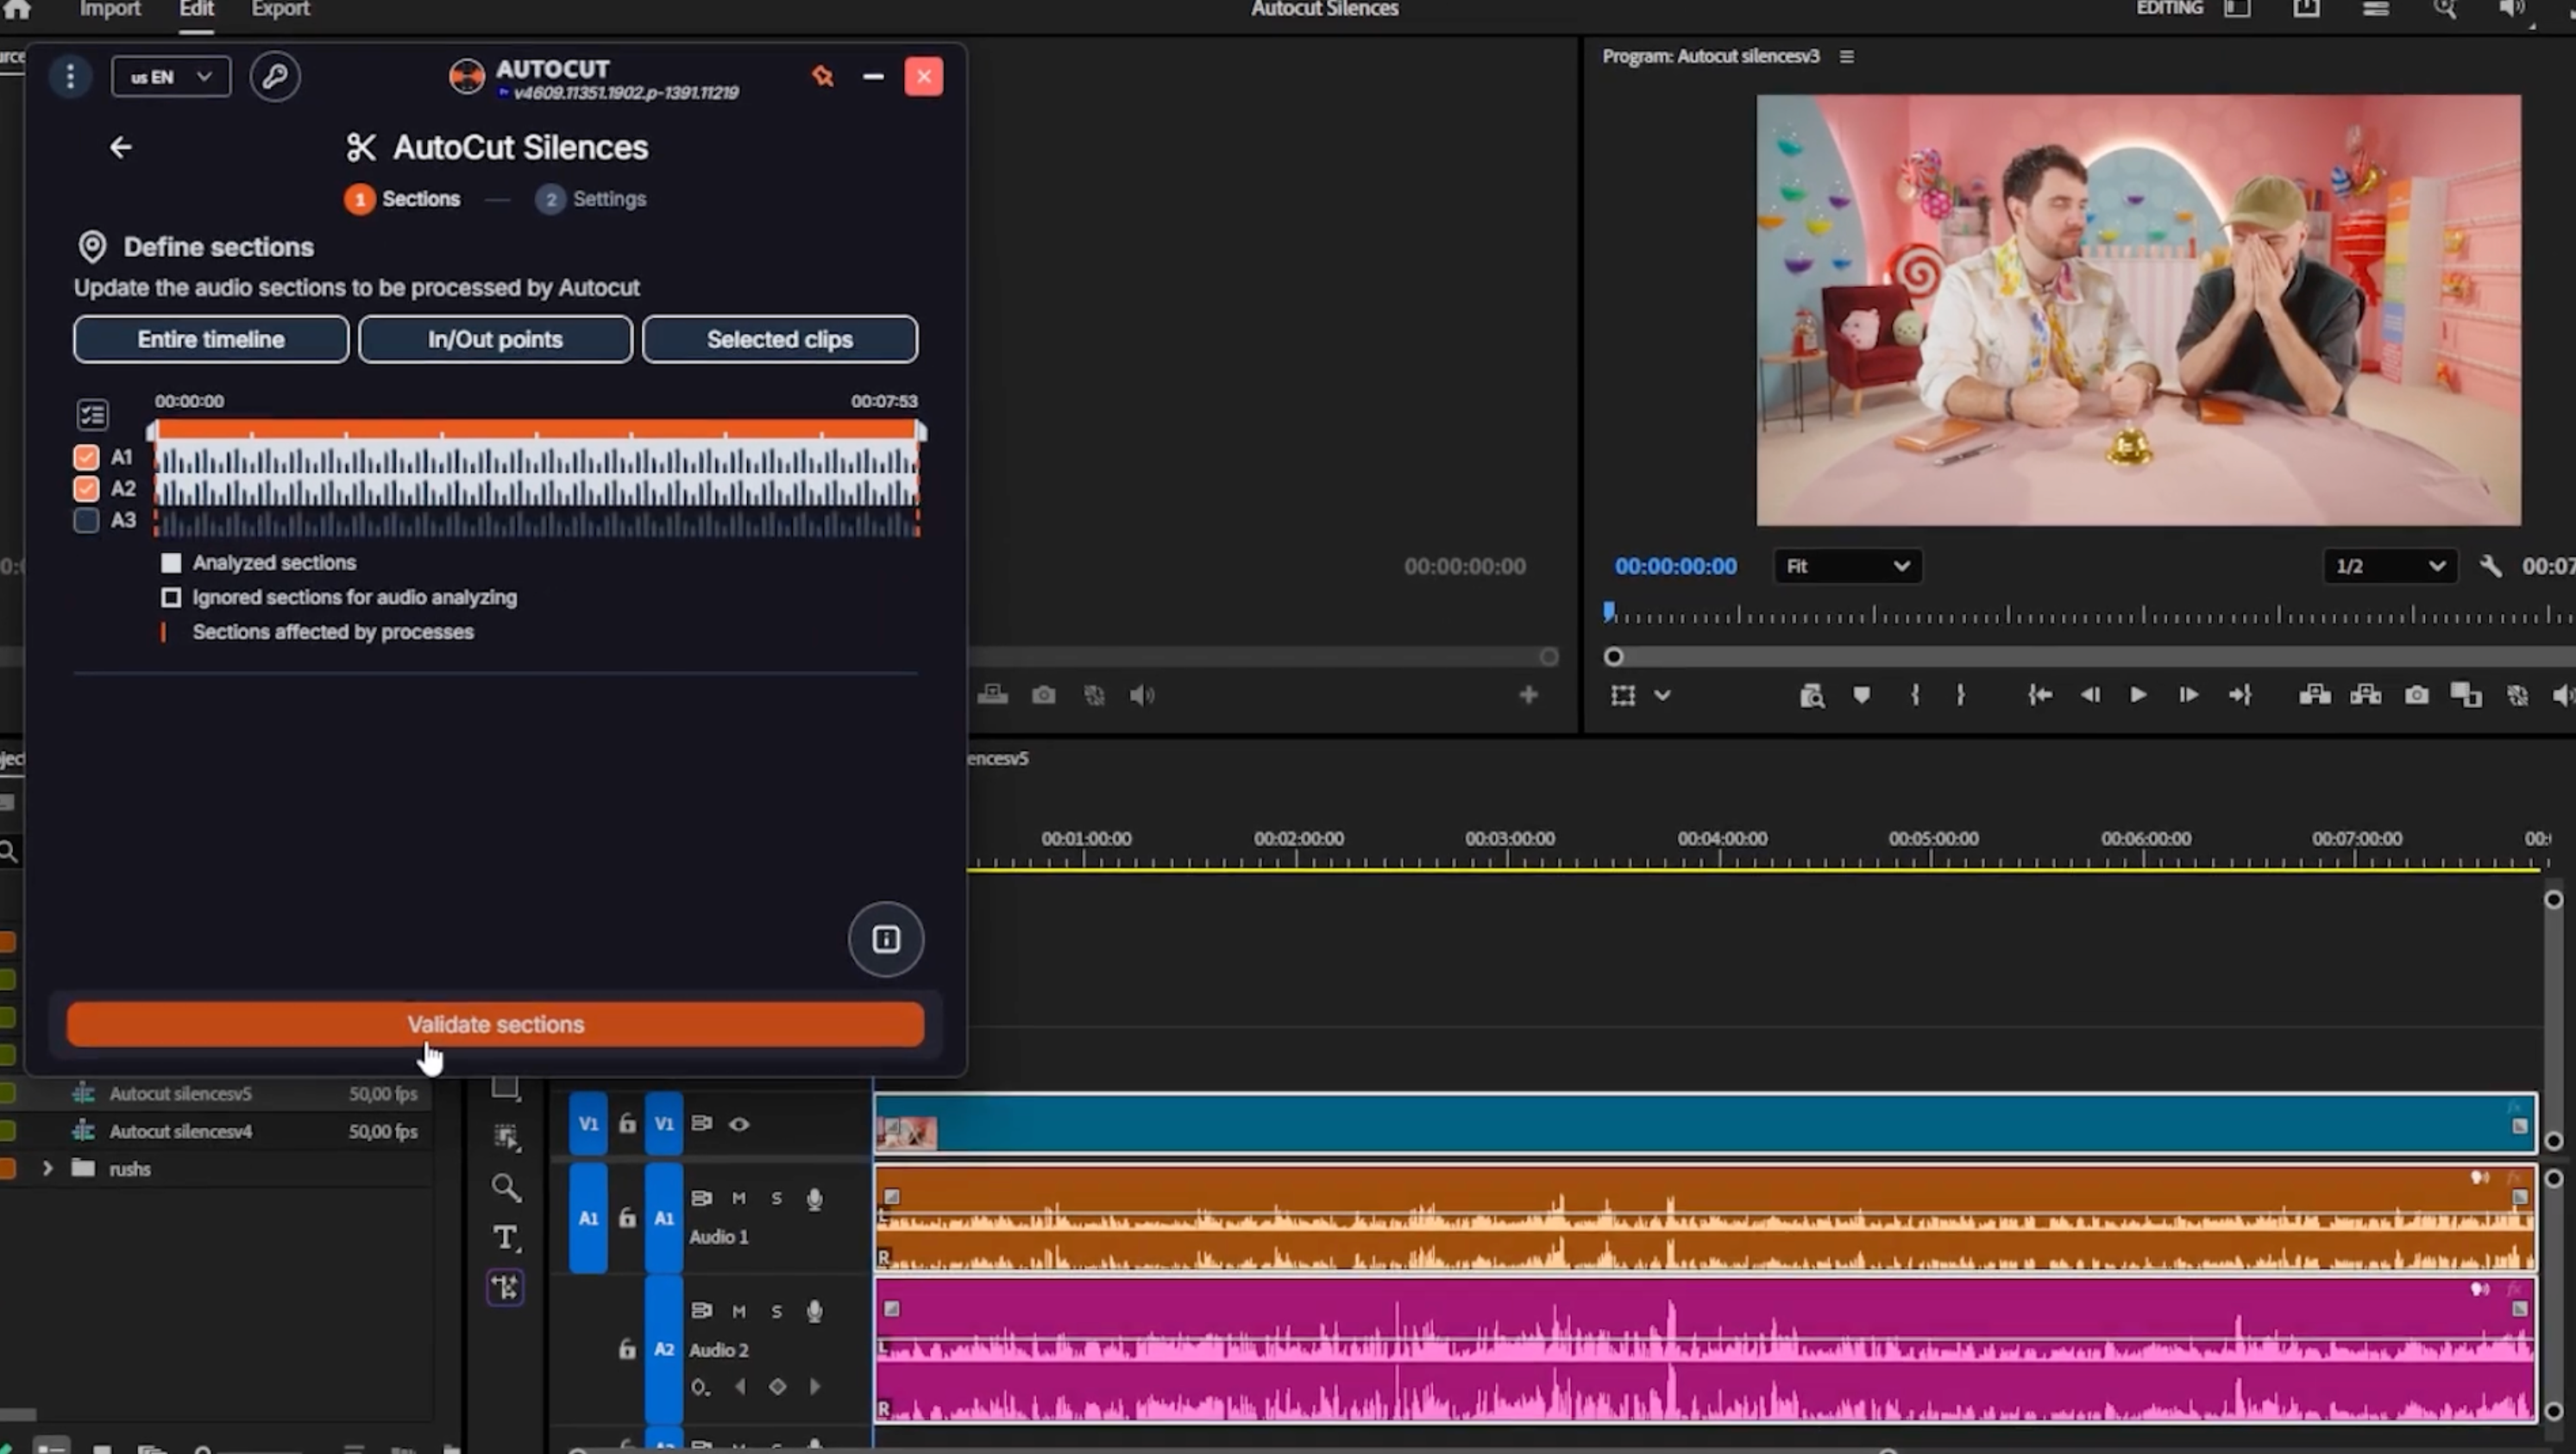
To get started, open the AutoCut Silence panel from your plugin menu inside your editing software. Once the panel is open, head to your timeline and select the clip or section you want to process: make sure to include all linked audio tracks in your selection so AutoCut can analyze the full audio signal.
With your sections highlighted on the timeline, click Validate sections in the AutoCut panel. This confirms your selection and prepares the plugin to begin its analysis. You're now ready to configure the silence detection settings.
Step 2: Set Your Noise Threshold — Now AI-Powered
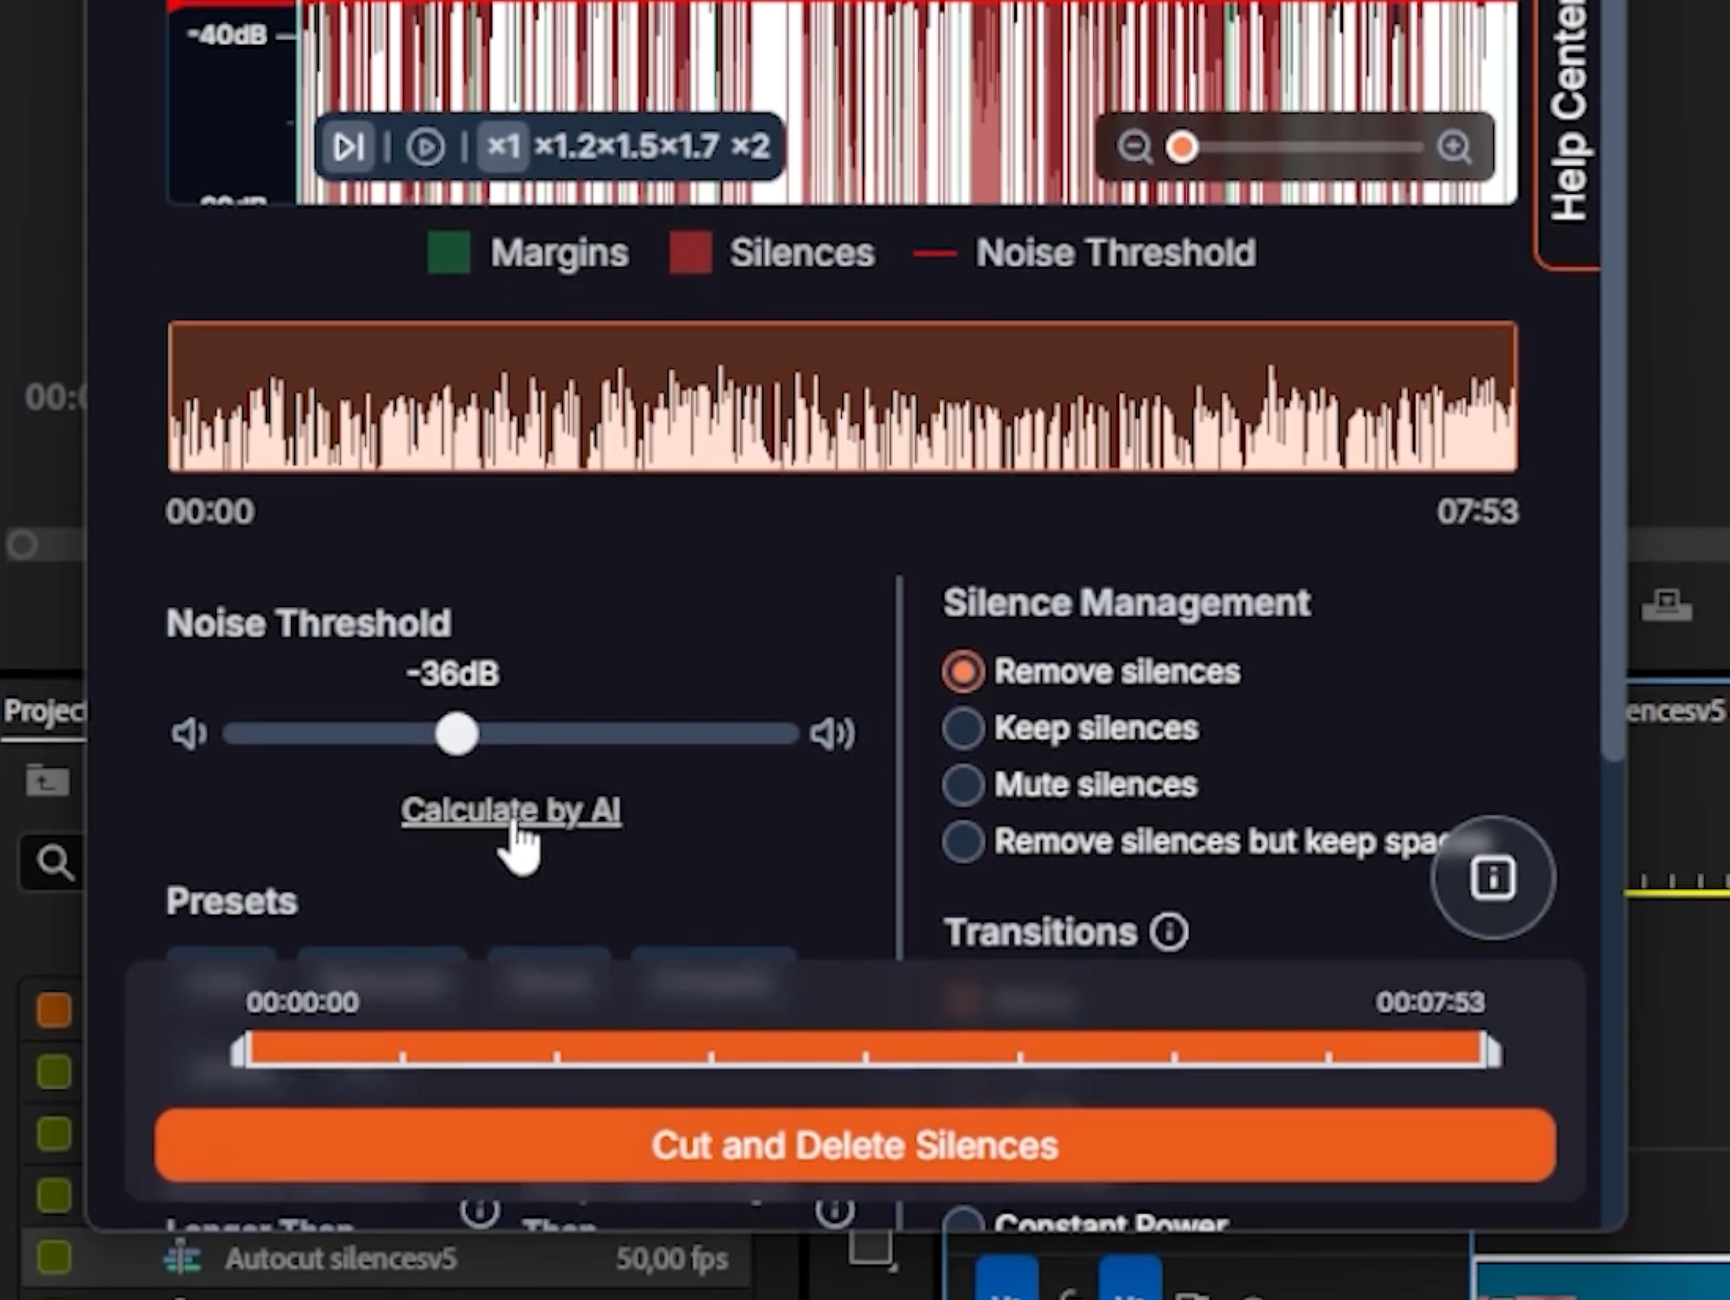
The noise threshold is the audio level below which a sound is considered silence. Any moment in your recording that falls below this value will be flagged for removal. You can set it manually using the slider — useful if you know your recording environment well — but the real game-changer is the new Calculate by AI button.
Click Calculate by AI and AutoCut will automatically analyze your audio and detect the optimal threshold with impressive precision — no guesswork needed. This AI-powered detection is one of the standout new features in the latest update, and it works remarkably well even in noisy recording environments. It's the fastest way to get an accurate threshold without any manual trial and error.
Step 3: Choose a Pacing Preset
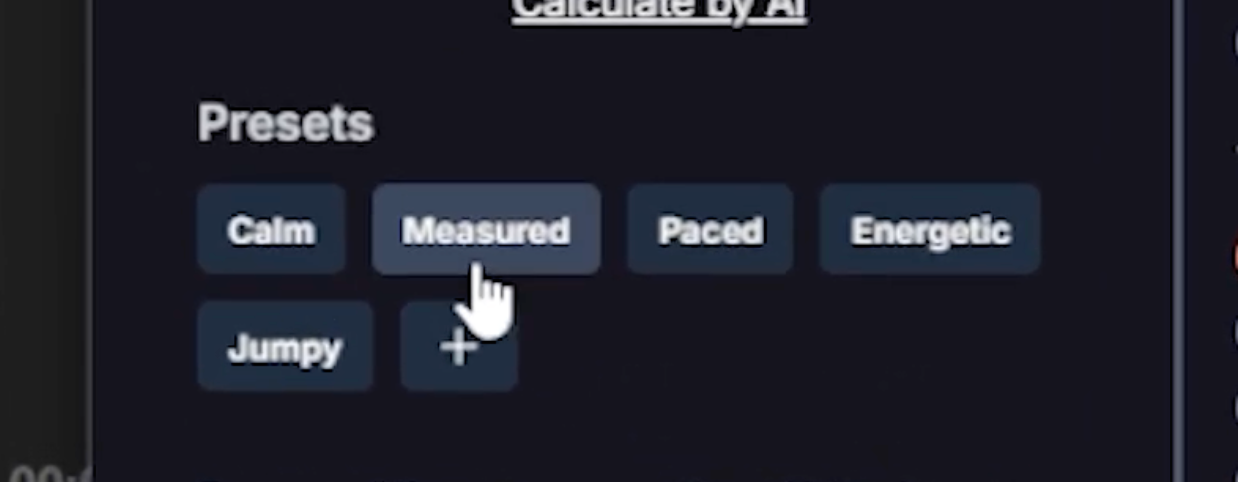
AutoCut offers five built-in pacing presets that instantly control how dynamic your cuts feel:
- Calm: relaxed pacing with longer silences kept in, ideal for slow-paced tutorials or interviews.
- Measured: a balanced, moderate rhythm that suits most talking-head or educational content.
- Paced: a noticeably tighter edit that keeps the viewer engaged without feeling rushed.
- Energetic: fast, punchy cuts that keep the energy high. Perfect for YouTube-style content where you want to stay dynamic without going overboard.
- Jumpy: the most aggressive preset, with very tight cuts that create a rapid-fire, high-intensity feel.
If none of the presets match your workflow, you can create a custom pacing preset, especially useful if you always film in the same studio with consistent audio gain. For complete control, manual pacing mode lets you enter exact millisecond values for every parameter. Our recommendation: start with Energetic for dynamic, engaging content, then fine-tune from there.
Step 4: Fine-Tune Silence & Speech Settings
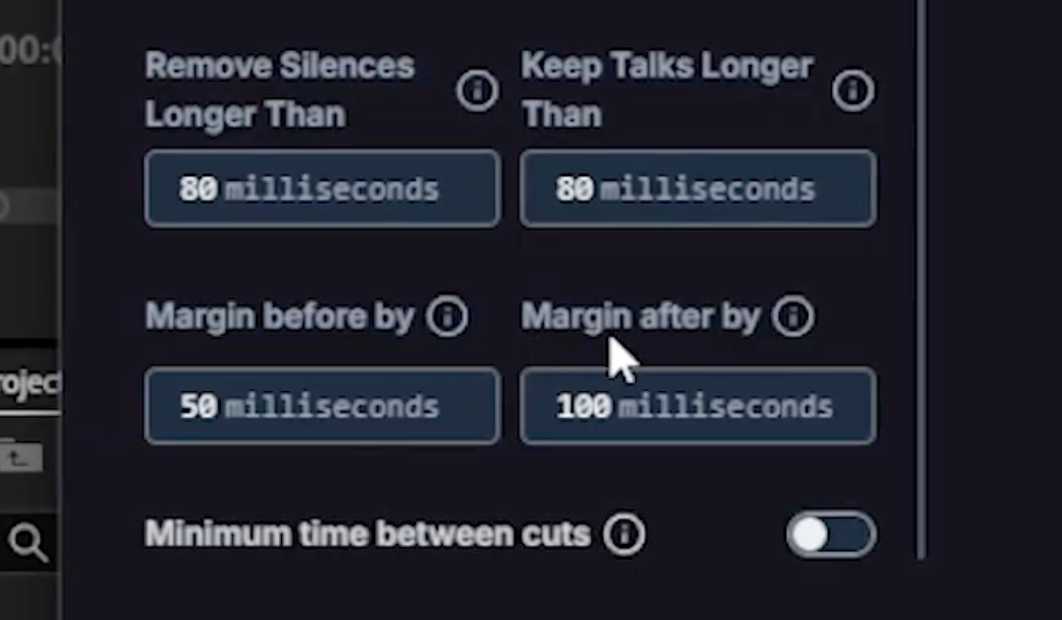
AutoCut gives you precise control over exactly which silences get cut and how much speech is preserved. The Remove silences longer than setting defines the minimum silence duration that will be removed, short pauses below this threshold are left intact for a natural feel. The Keep talks longer than setting ensures that very brief speech fragments aren't accidentally preserved, only meaningful speech segments make the cut.
You can also add margins before and after each cut to add a small buffer, preventing cuts that feel too abrupt. The minimum time between cuts setting is particularly useful if you plan to make manual adjustments afterward, it prevents cuts from being placed too close together, giving you enough room to work with each segment individually.
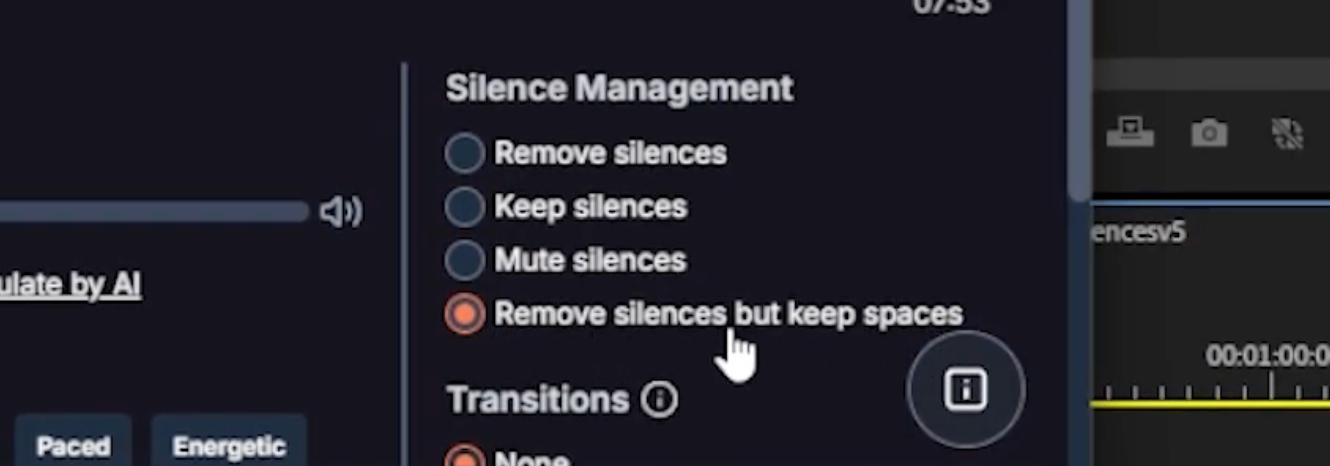
Step 5: Choose How to Handle Silences
AutoCut gives you four ways to handle detected silences, so you can choose the approach that best fits your workflow:
- Remove and join clips: silences are cut out and the remaining clips are joined together seamlessly. This is the most common mode and delivers maximum time savings.
- Keep silences and just get the cuts: AutoCut marks the cut points on your timeline without removing anything, giving you full manual control over what to delete.
- Mute the sound: silent sections are kept on the timeline but their audio is muted, useful when you want to preserve the visual continuity of a clip.
- Remove while keeping a small gap: silences are removed but a brief gap is left between clips, making it easier to identify where cuts were made.
For most creators, we recommend Remove and join clips, it's the fastest path to a clean, export-ready edit.
Step 6: Add Smooth Transitions Between Cuts
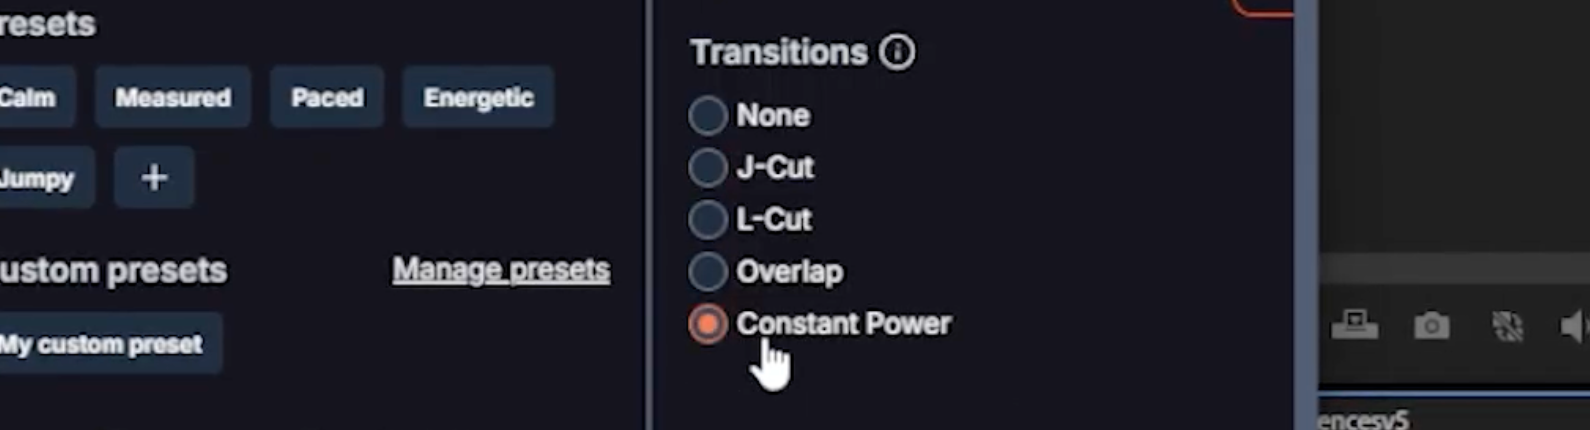
Raw cuts can sometimes feel jarring, especially when audio changes abruptly between clips. AutoCut offers four transition types to make your edits feel polished and professional:
- J-cut: the audio from the next clip starts playing before its video appears. Creates a sense of anticipation and smooth flow. You can set the exact transition length.
- L-cut: the audio from the previous clip continues playing after the next clip's video has already appeared. Great for maintaining narrative continuity. Transition length is adjustable.
- Overlap: two clips briefly overlap at the cut point, blending audio and video for a seamless transition. The overlap duration is fully configurable.
- Constant Power: a smooth audio crossfade that gradually fades out the outgoing clip while fading in the incoming one. This is the most natural-sounding transition for most content types.
Our recommendation: use Constant Power for a smooth, professional result that works well across virtually any type of content.
Step 7: Live Preview & Final Cut
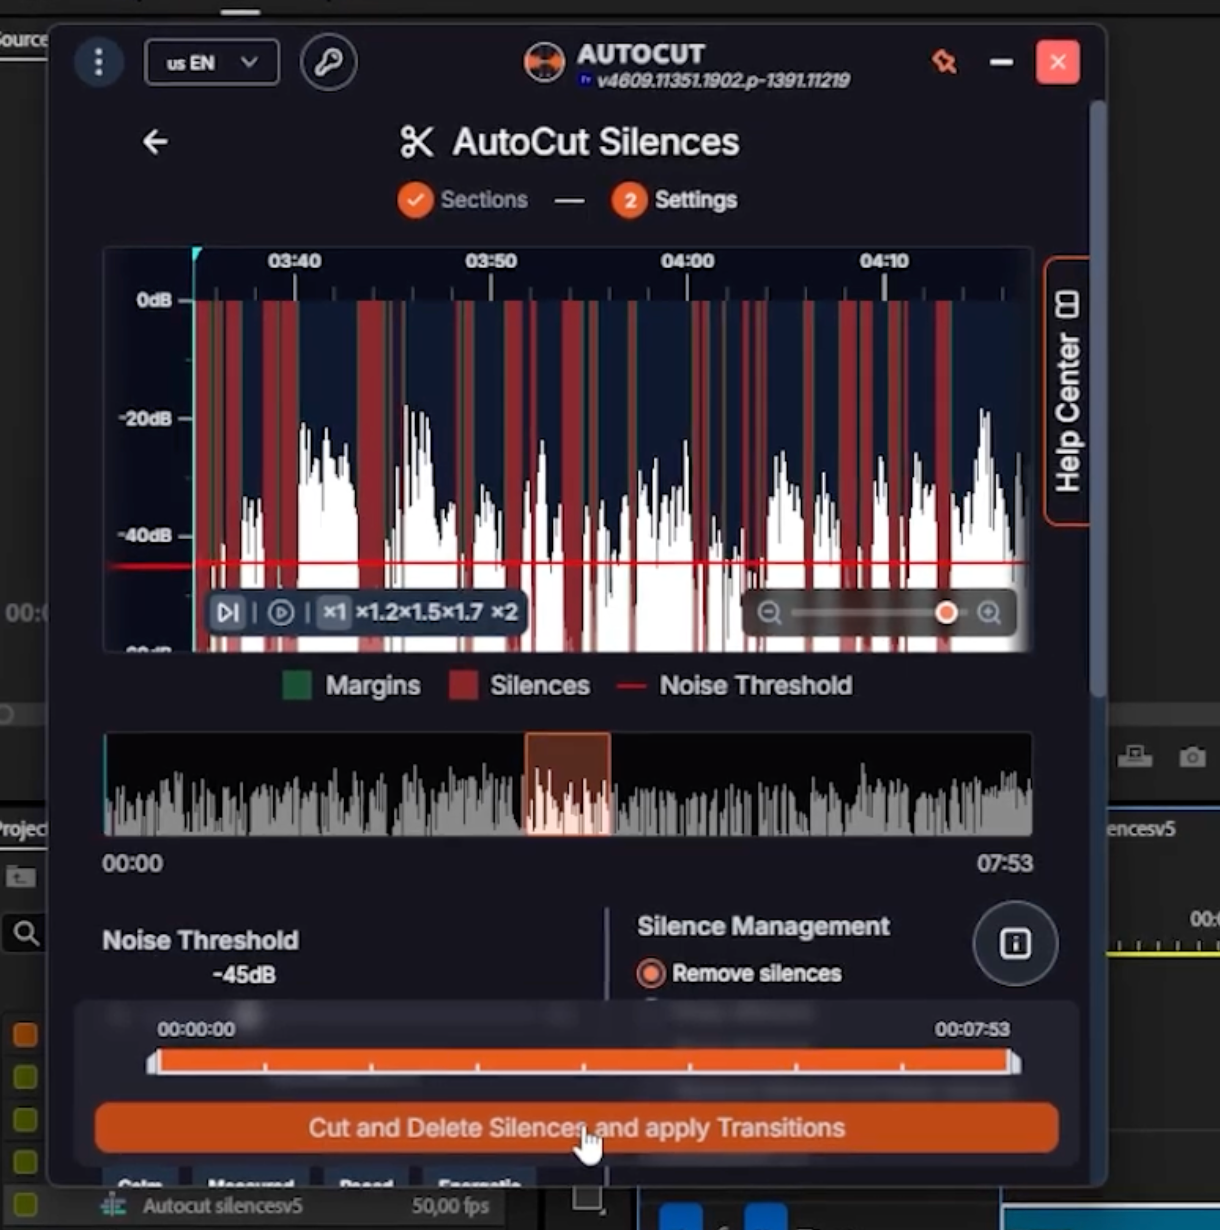
Before committing to any cuts, use the Live Preview at the top of the AutoCut panel. It updates in real time as you adjust your settings, showing you exactly which sections will be kept and which will be removed, color-coded directly on the timeline. This lets you dial in your settings with confidence before making any permanent changes.
Once you're happy with the preview, click Cut and delete silences. AutoCut handles everything automatically: removing silences, joining clips, and adding smooth audio crossfades between each cut. The result is a clean, tight, ready-to-export edit delivered in seconds.
AutoCut Is Now the Fastest Silence Cutter on the Market
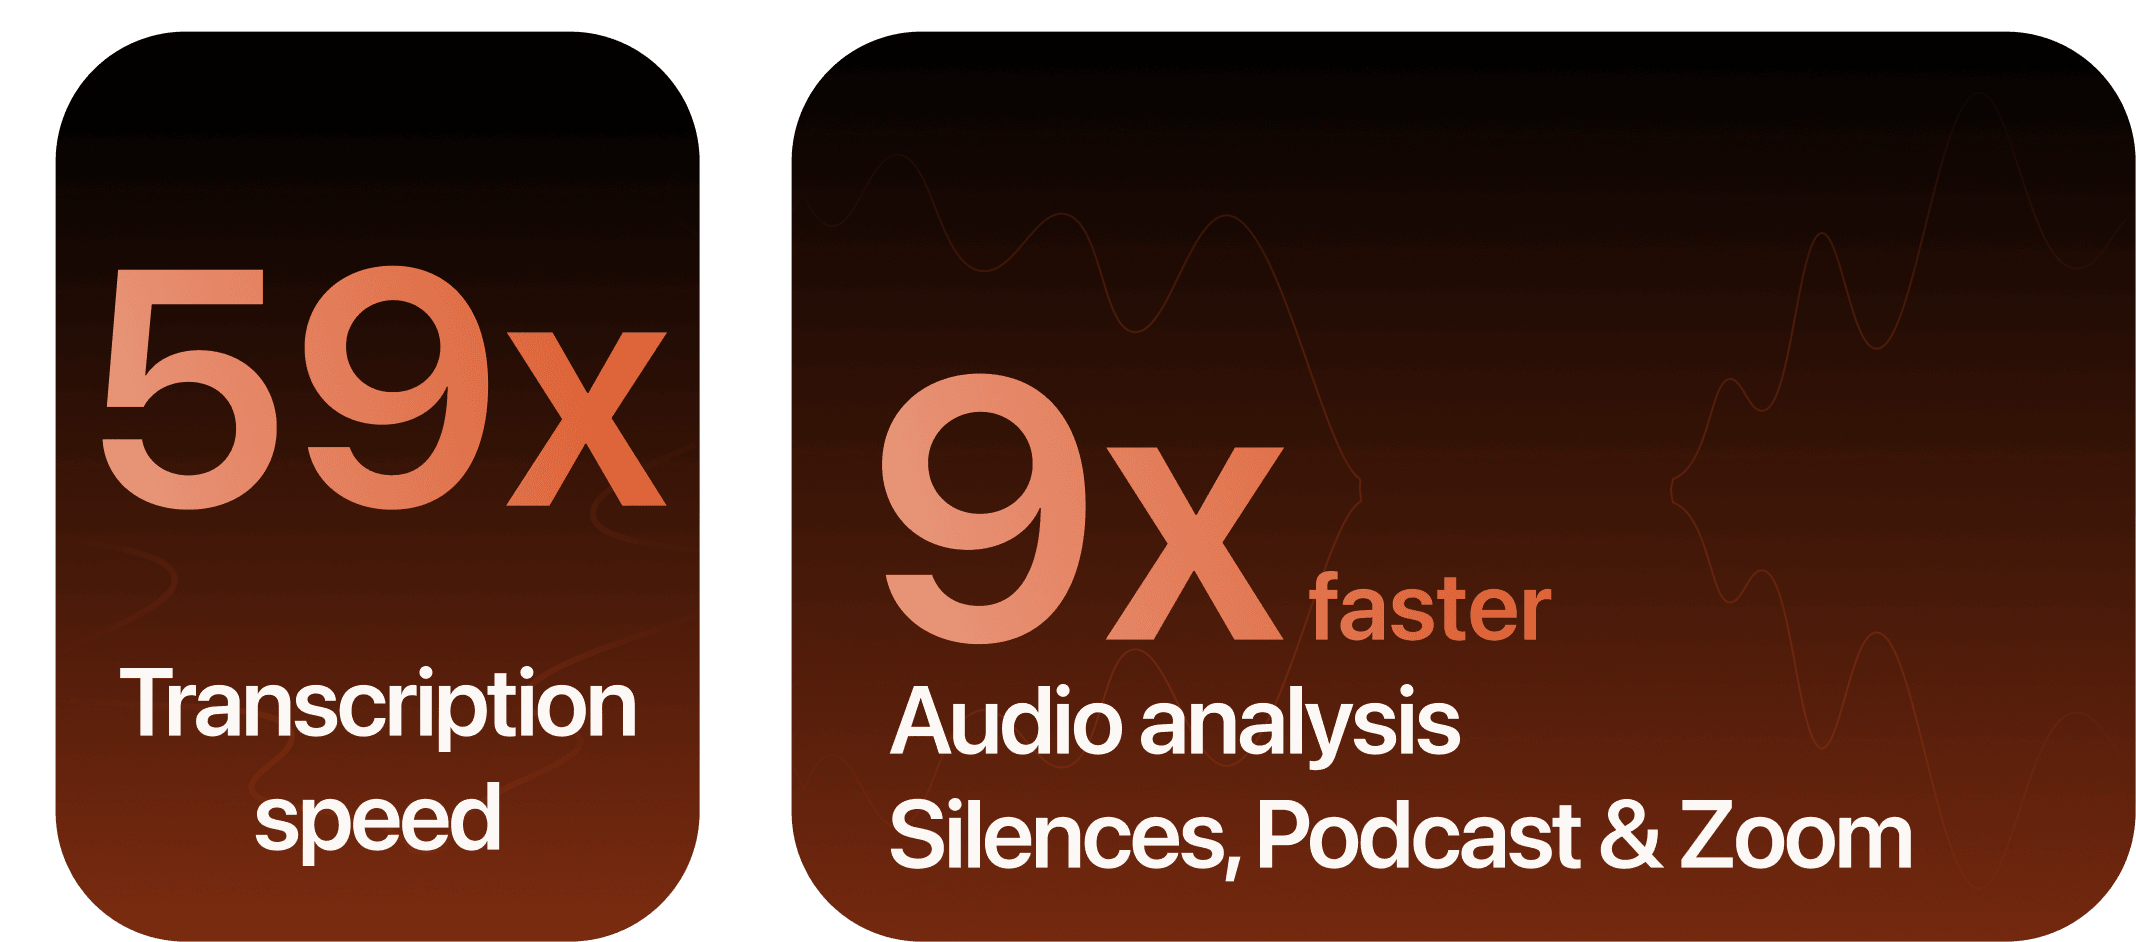
The latest AutoCut update is a major leap forward in performance. Audio analysis is now up to 9× faster and transcription is up to 59× faster than before, making AutoCut the fastest silence-cutting tool available today, by a wide margin. If you've been looking for a way to dramatically speed up your post-production workflow, this is it. Try AutoCut free for 14 days: no credit card needed.
Myriam HINDERER
Chief Marketing & Communication Officer