 AutoCaptions
 AutoCut Silences
 AutoCut Podcast
 AutoCut Angles
 AutoZoom
 AutoViral
 AutoB-Rolls
 AutoCut Repeat
 AutoProfanity Filter
 AutoChapters
 AutoResize
 Help Center
 Blog
Blog Discord
 YouTube
 Ambassador
Myriam HINDERER
Chief Marketing & Communication Officer
2026-08-12
How to Automatically Switch Camera Angles in Premiere Pro with AutoCut (2026)
Editing multicam footage by hand takes hours. With AutoCut Angles you switch between your camera angles automatically in about a minute, and the new multicam editing mode keeps your original footage untouched so you stay fully in control.
Summarize content with
 Chatgpt
 Mistral
 Gemini
 Perplexity
What Is AutoCut Angles?
AutoCut Angles automatically switches between your camera angles based on your voice and your footage, so you do not have to place every cut by hand. It is built for solo creators who record with more than one camera, a face cam, a side angle, a close-up, and want the dynamic feel of a multicam edit without the manual work.
Think of it as AutoCut Podcast for a single person: instead of switching between several speakers, it intelligently switches between your own angles to keep your videos engaging. What used to take hours of scrubbing now runs in about a minute, directly inside Premiere Pro or DaVinci Resolve, and AutoCut gives you two ways to do it.
Step 1: Open AutoCut Angles and Validate Your Sections
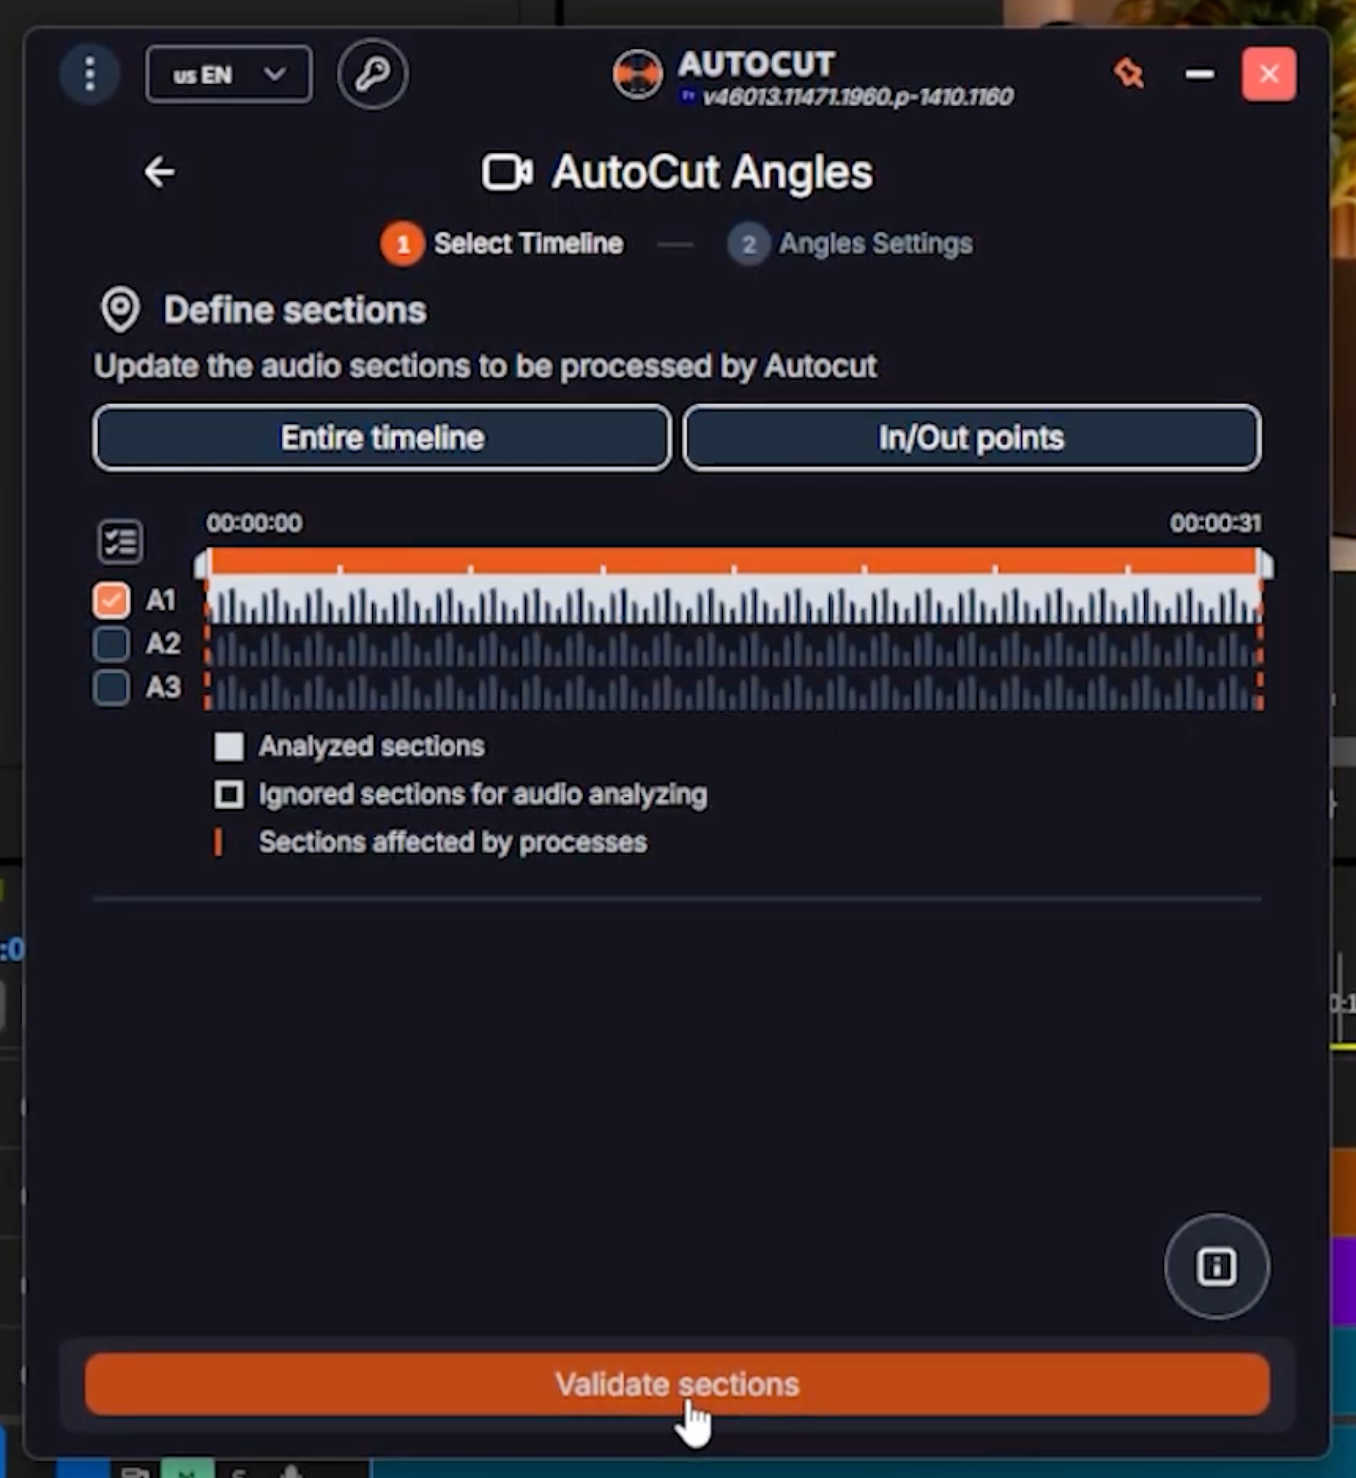
Open AutoCut Angles, then select the section you want to edit on your timeline, along with the audio tracks linked to your footage. Once everything is selected, click Validate sections. AutoCut is now ready to analyze your clips.
Step 2: Configure Your Voice and Camera Tracks
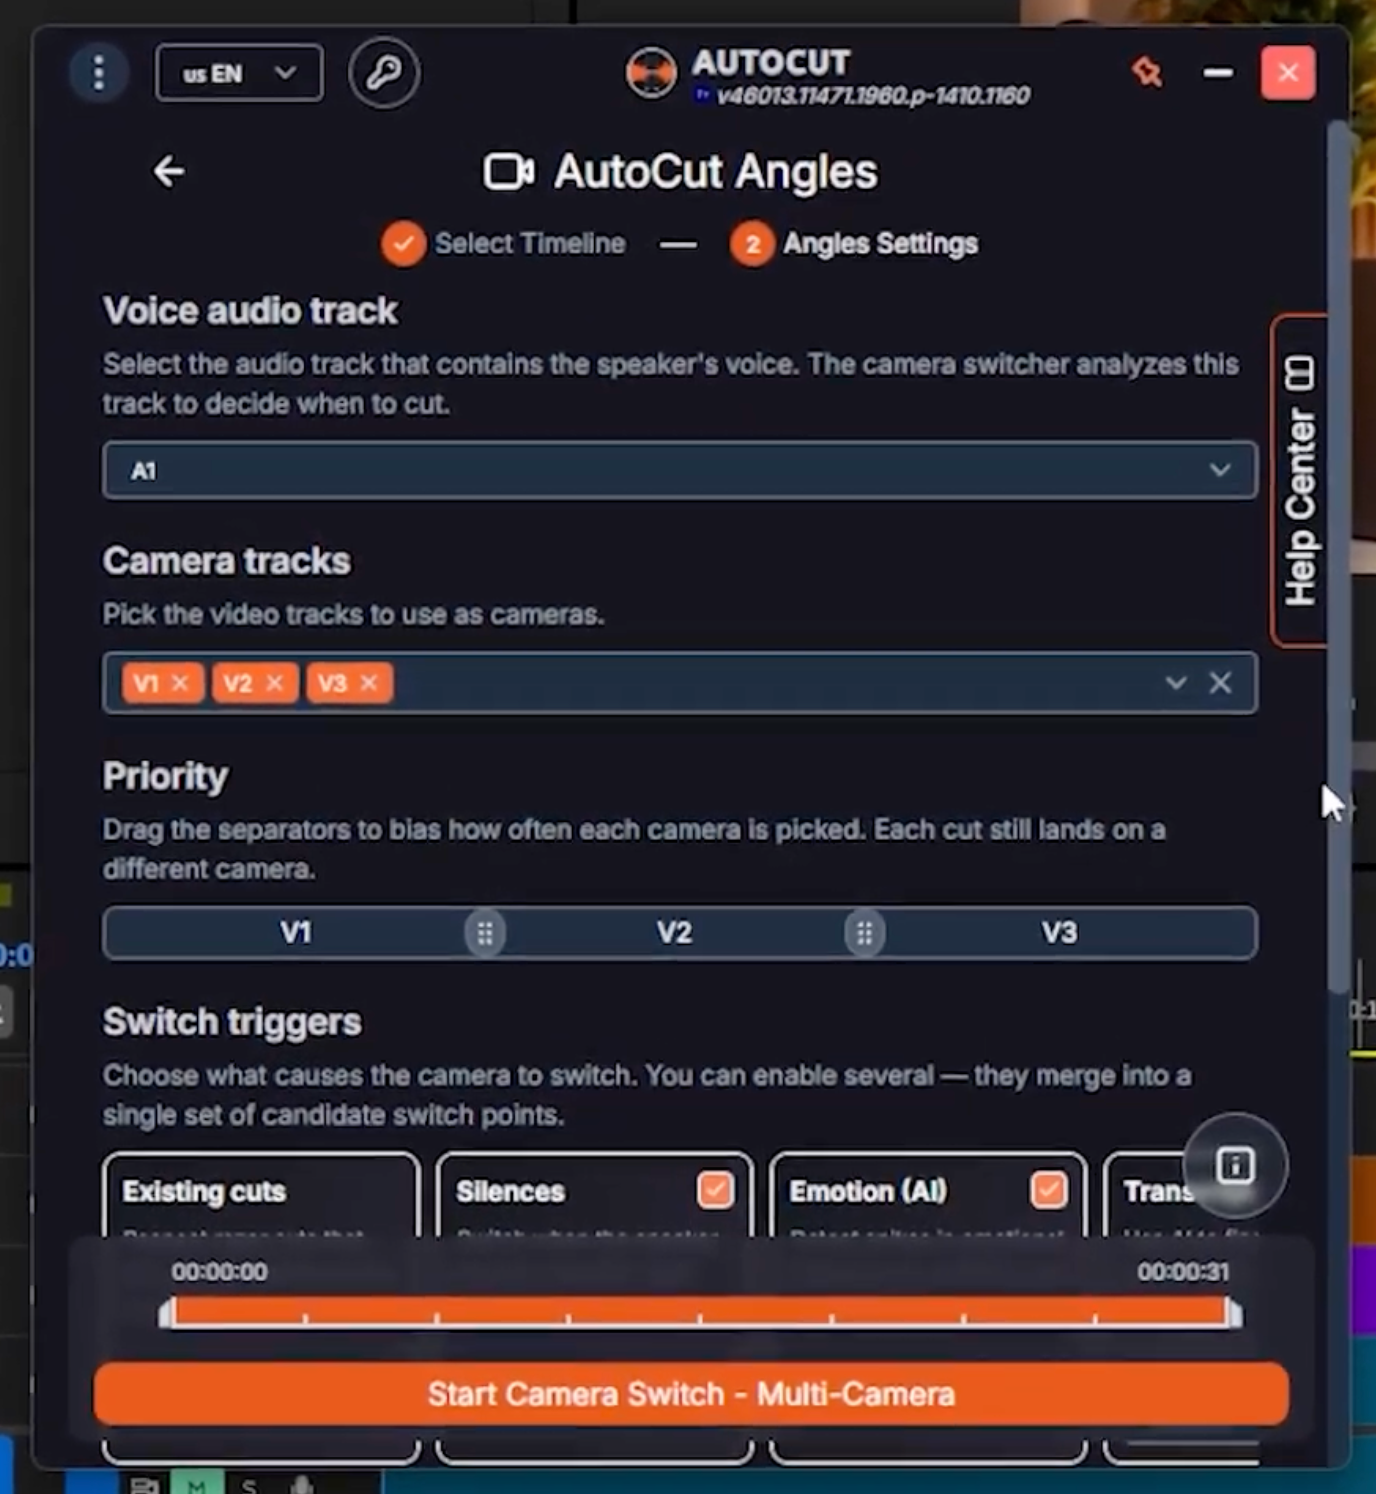
This is the most important part. Start by setting up your tracks:
- Voice audio track: the vocal track AutoCut analyzes to decide when to switch cameras. Most solo setups only have one, which is perfectly fine.
- Camera tracks: the video tracks that match your different angles, like your face cam, a close-up, or a side camera.
- Camera priority: drag the separators to bias how often each angle gets picked. Do not worry about repetition, AutoCut never lands on the same camera twice in a row.
Step 3: Choose Your Switch Triggers
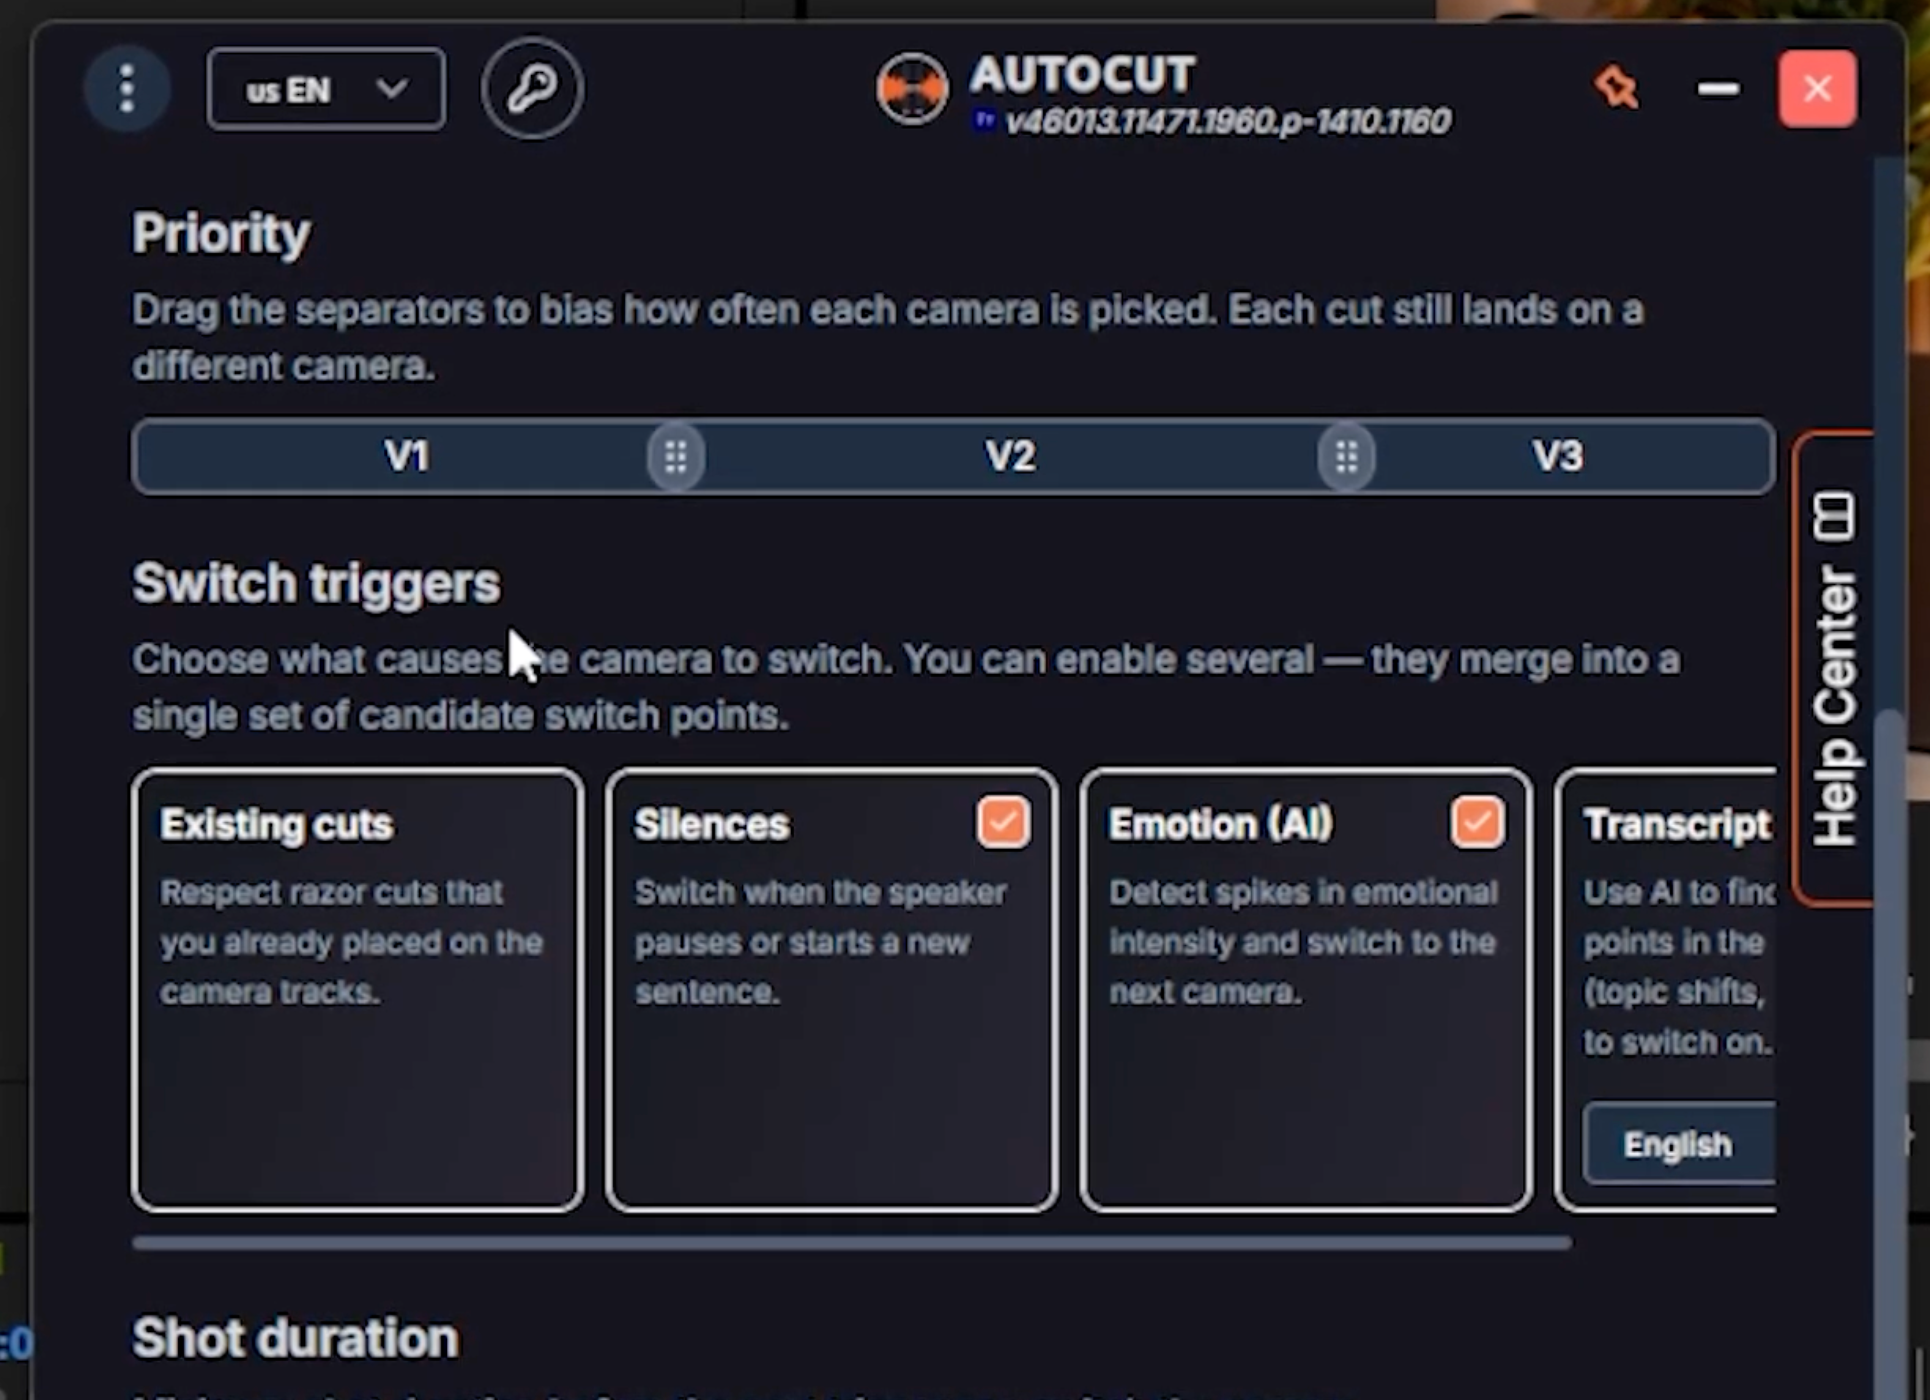
Switch triggers decide what causes a camera change, and you can turn on several at once to combine them:
- Existing cuts: respects the cuts you have already placed manually on your camera tracks.
- Silences: switches when you pause or start a new sentence.
- Emotion: uses AI to detect spikes of intensity in your voice and switches on those moments.
- Transcript: uses AI on your transcript to find natural cut points, like a topic change.
Leaving all of them on gives a consistent, natural result. Then set the shot duration, the minimum length of a shot before a new trigger can switch the camera again. We recommend keeping it at a minimum of 2 to 3 seconds to avoid overly jumpy cuts.
Method 1: The Classic Camera Switch
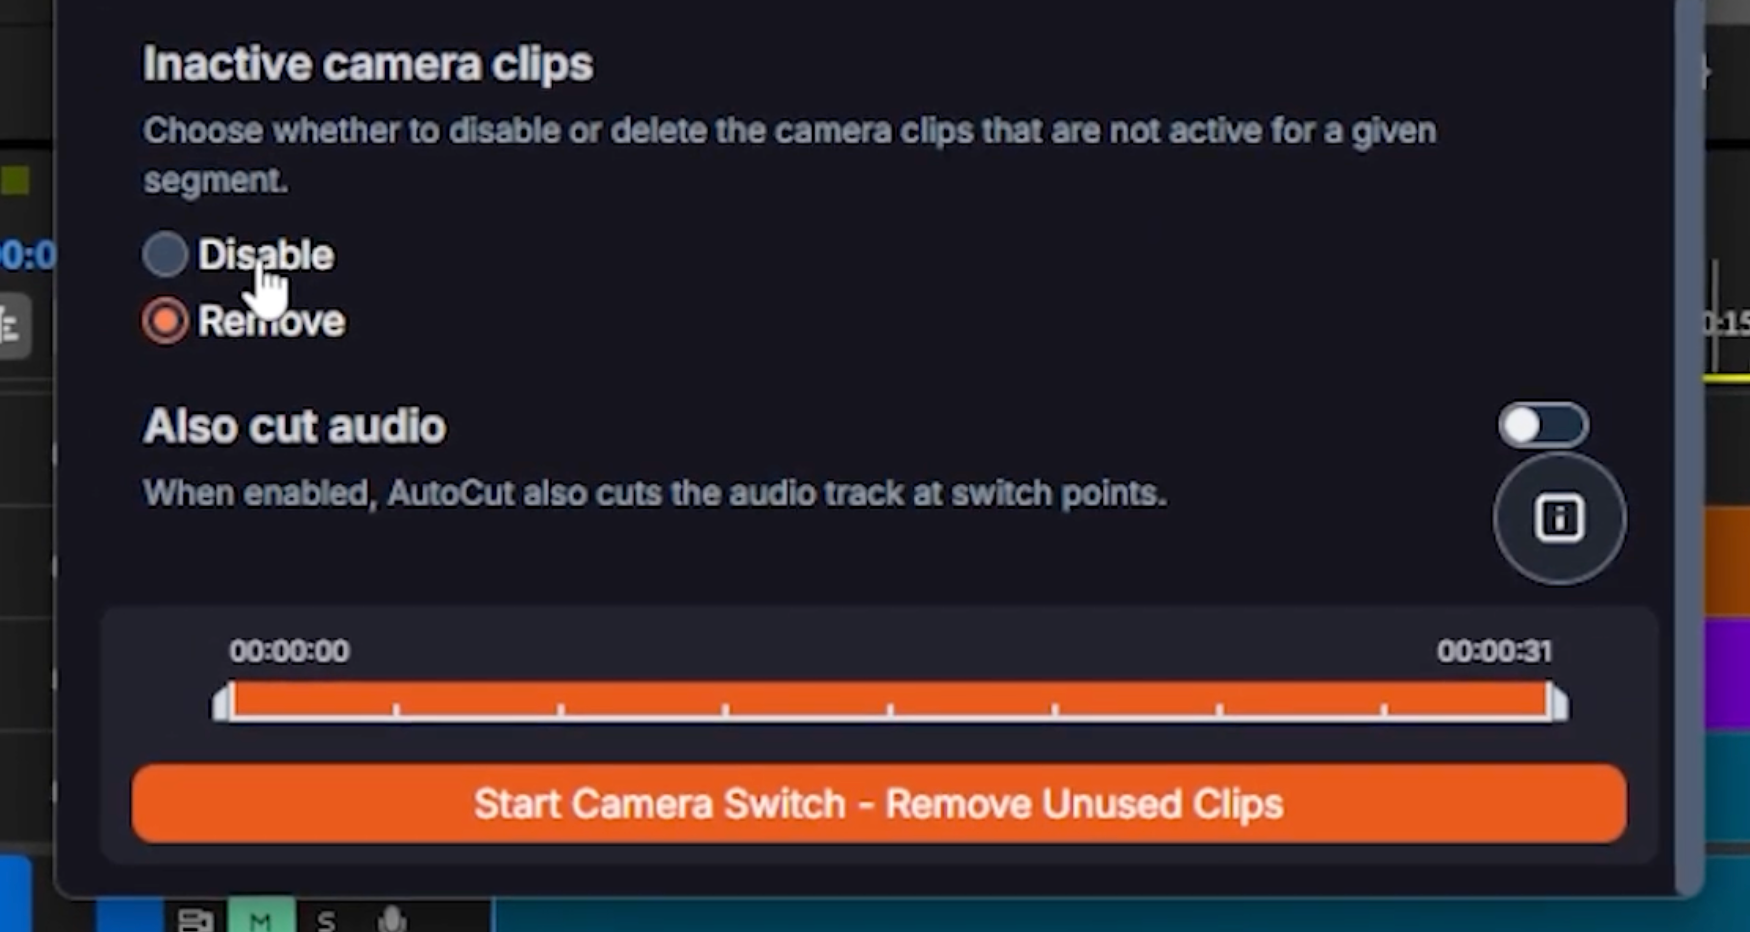
For the first method, decide how to handle your inactive camera clips:
- Disable: turns the inactive clips off. We recommend this option, it gives you more control if you need to tweak a section afterward.
- Remove: deletes the inactive clips outright.
Turn on Also cut audio if you want AutoCut to cut your audio track at the switch points too. When you are ready, click Start camera switch, and AutoCut builds your multi-angle edit in seconds.
Quick thing before we dive into the second method: you can try AutoCut completely free for 14 days, no credit card needed.
Method 2 (New): The Multicam Editing Mode
Here is the new way to work, and it is a real game changer for anyone who likes to fine-tune. Set up your configuration exactly as before, then simply turn on Multi camera editing and click Start camera switch multicam.
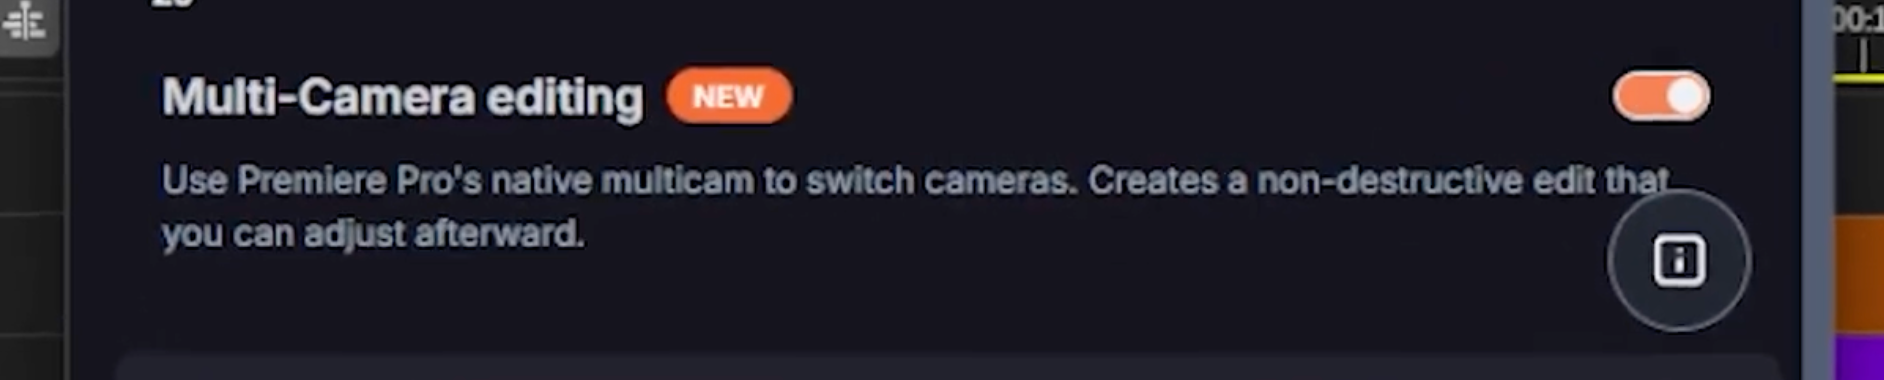
The big difference: your original footage does not move. AutoCut creates a multicam sequence right above your timeline, so the edit is fully non-destructive. Your rushes stay exactly where they are, untouched.
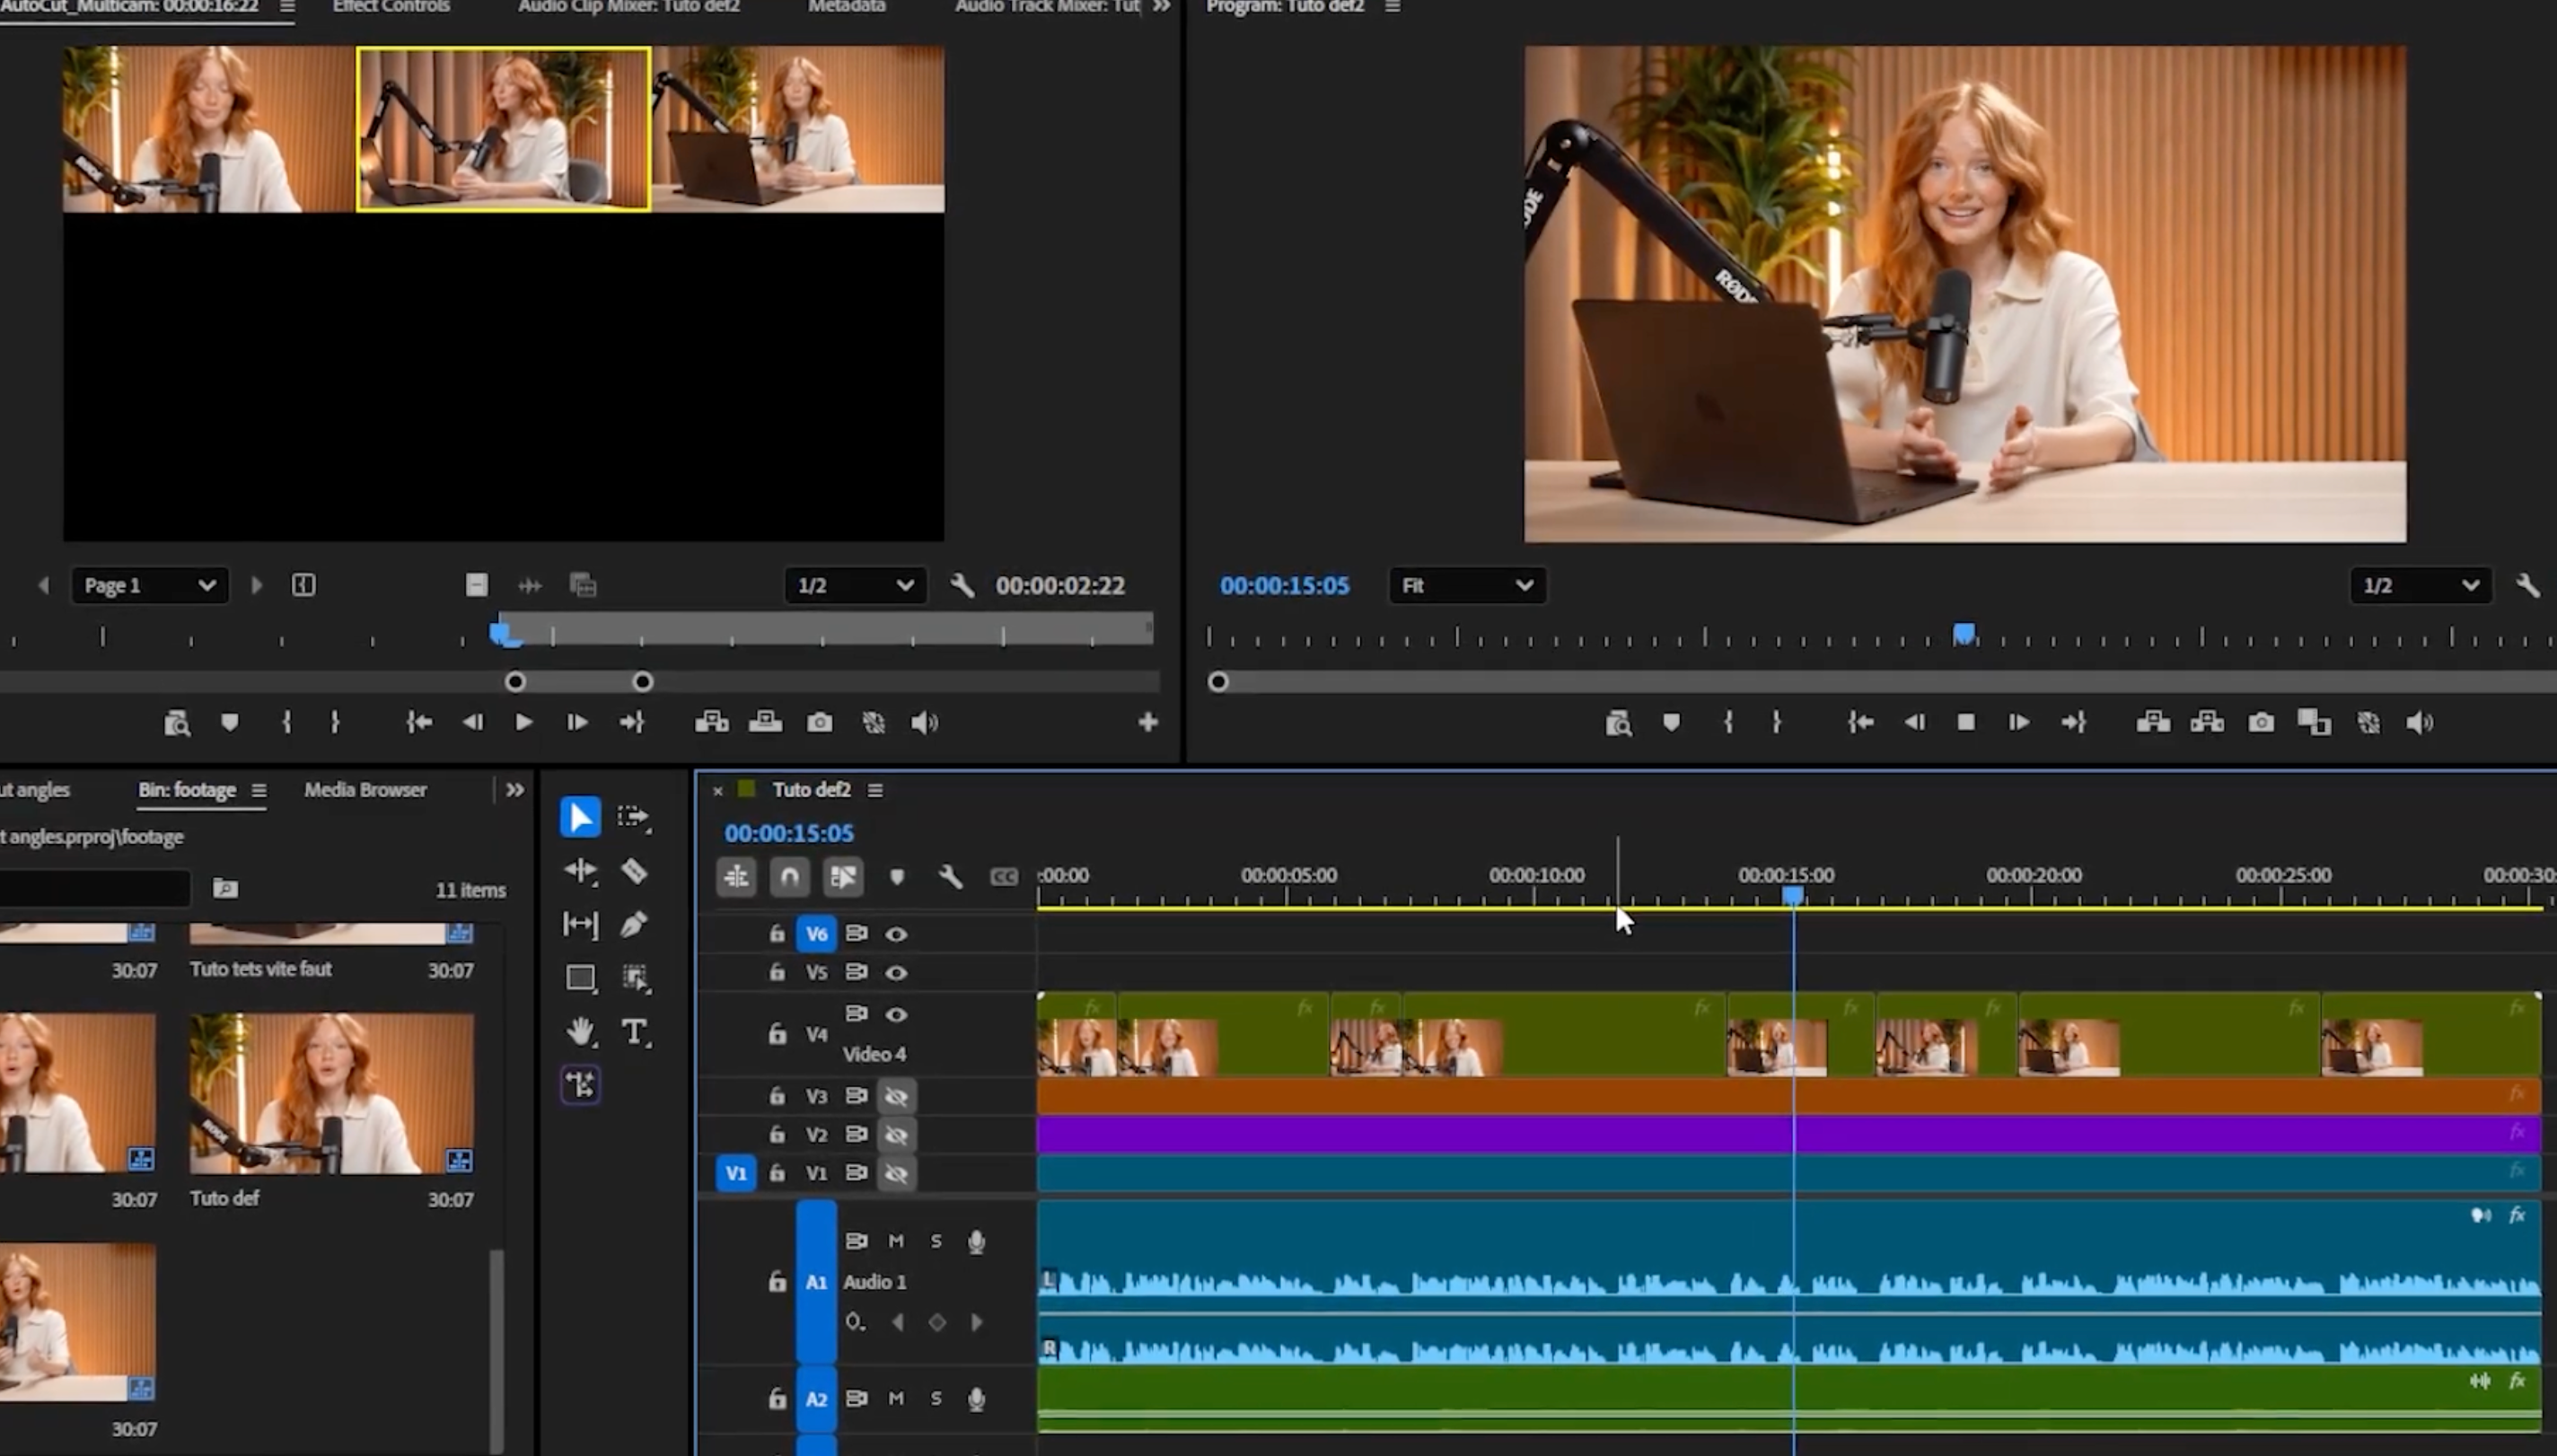
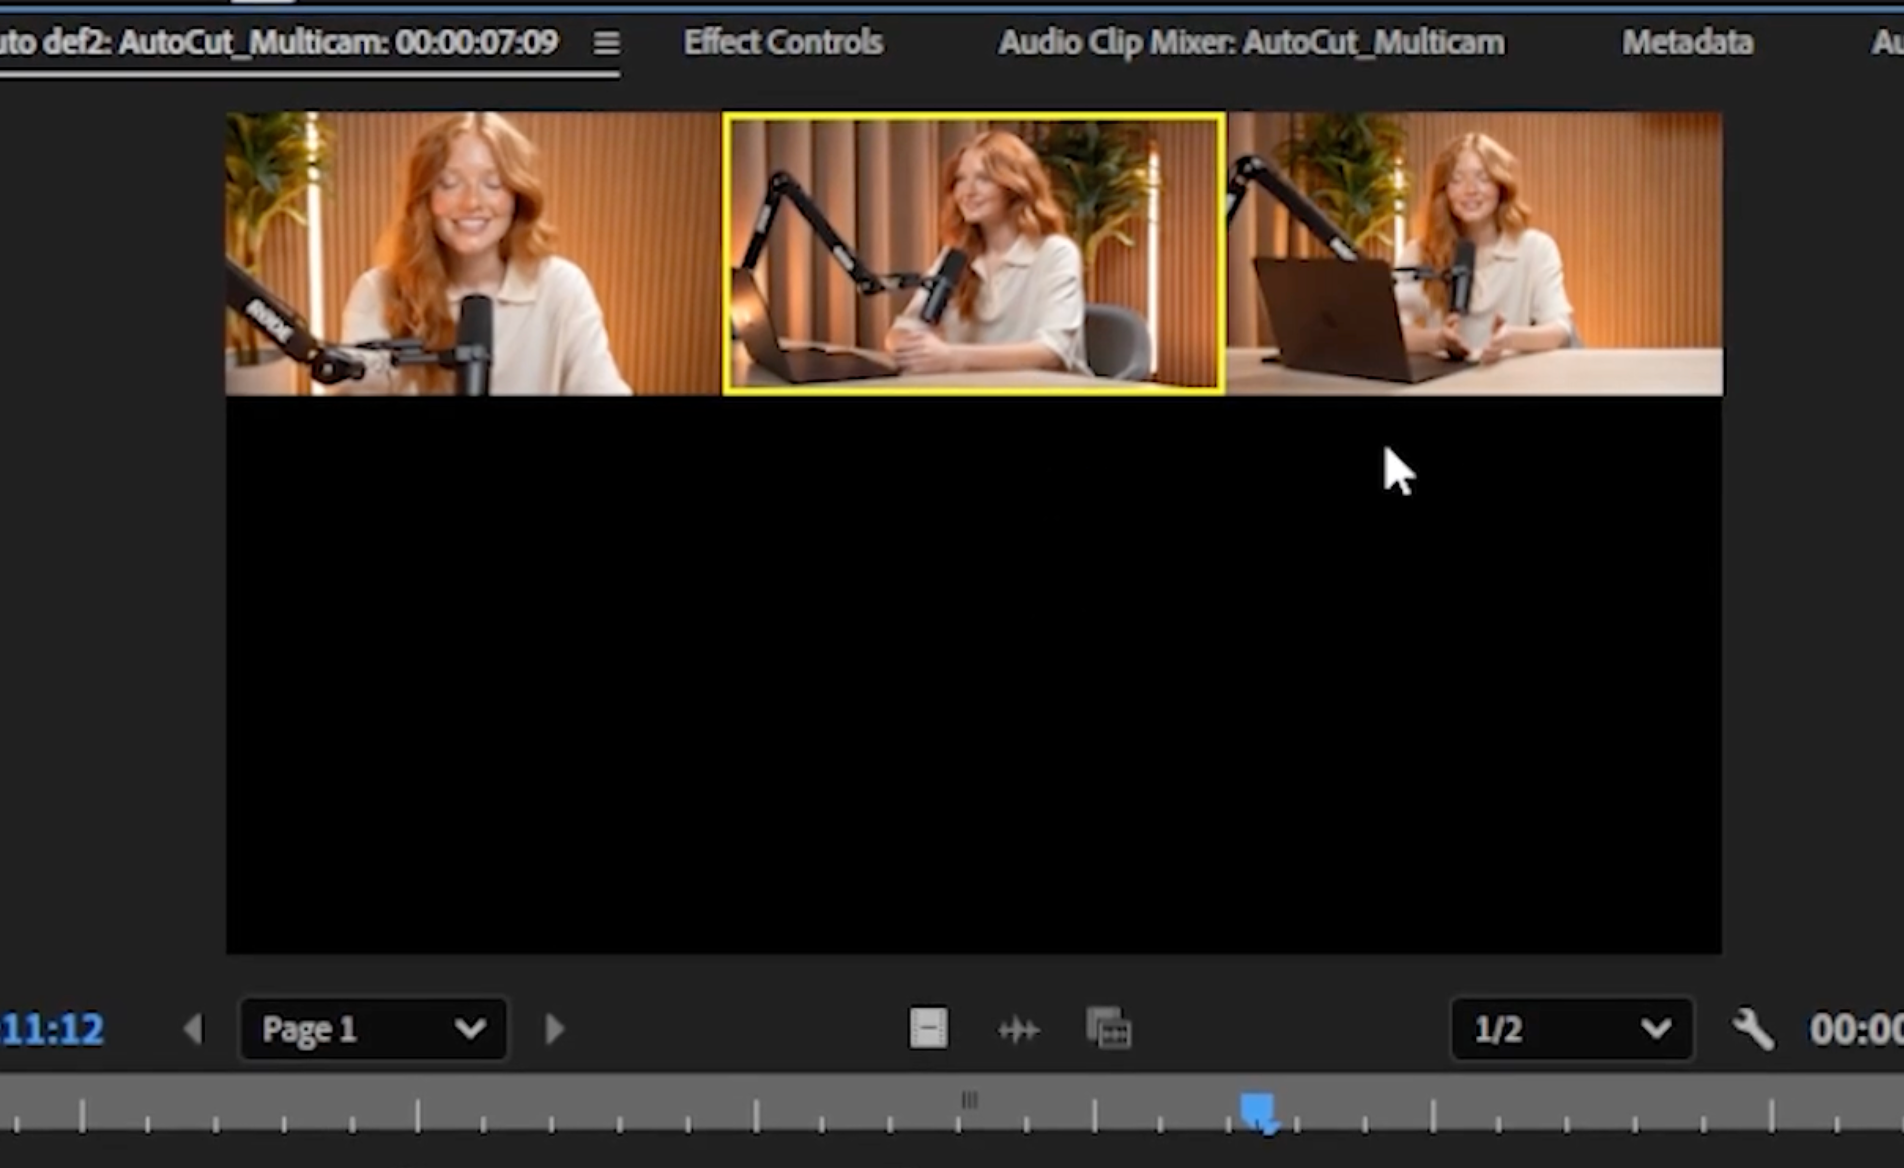
Want to change a switch? Double-click any part you want to adjust and Premiere Pro's multicam window opens. Pick the camera you want and it switches instantly. Same speed as the classic method, but with full manual control whenever you need it.
Combine AutoCut Angles With Silences and Zoom
To automate your editing even further, chain AutoCut Angles with the other modes. A great solo workflow: run AutoCut Silences first to cut the dead air, then AutoCut Angles to switch your cameras automatically, and finish with AutoZoom for dynamic, automatic zooms. Your whole edit runs on autopilot.
Try AutoCut Angles Today
Two ways to work, same speed, and a new non-destructive multicam mode that keeps you in full control. If you record from more than one angle, AutoCut Angles will save you hours on every edit. Try AutoCut free for 14 days, no credit card needed, and subscribe to our channel for more quick tutorials.
Myriam HINDERER
Chief Marketing & Communication Officer